We hope all of our American friends had a safe and enjoyable Labor Day! Our weekend was filled with family visits and some much needed down time. Today we’re going to show you how we finished up our new garage outlet and how we added a workbench charging station.
Let’s start with the garage outlet.
Last week we had our rough-in inspection from the township electrical inspector. It went well. He passed us so we can “device out” the work, which means add the new outlet.
To power the new outlet, we tapped into the power from an existing GFCI outlet in our basement. I had to remove this basement outlet as part of the rough-in work and show the inspector I ran the cable properly to the box and tied it in appropriately.
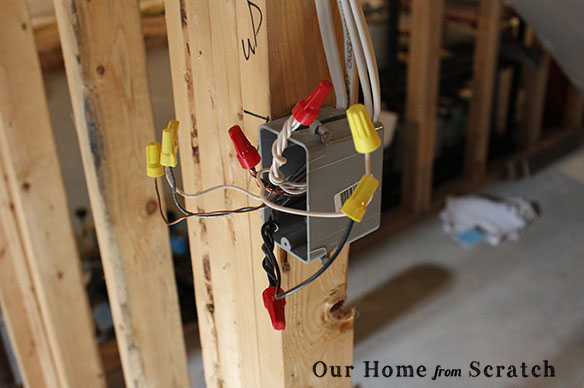
After inspecting this box, he recommended I increase its size to accommodate the additional cable. The box already had three cables going to it and this new circuit added a fourth. Thus, he wanted to see a slightly bigger box. So, I had to untwist all my cables, pull them out of the box, take the box off the lumber and then add a bigger box.
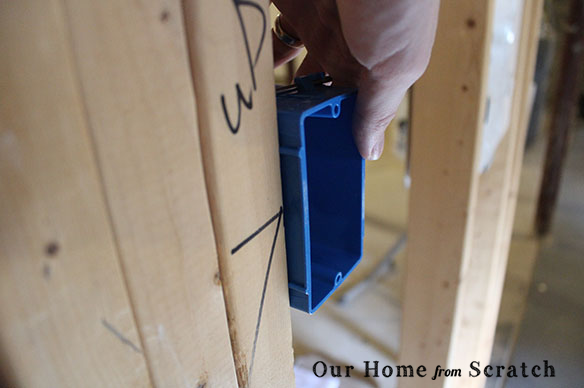
The new box is considered “new work” whereas our garage outlet is “old work.” The difference is the basement outlet box is being directly attached to a wall stud. The garage outlet was placed into a finished drywalled space. The new box is also plastic and has a couple 1/2″ tabs that help me position the box onto the studs. The box shouldn’t be installed flush with the studs, but 1/2″ further out for future drywall.
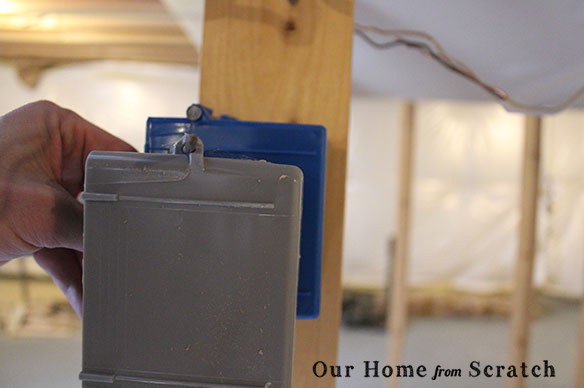
This new box wasn’t that much bigger than the first, only by a couple cubic inches. Here’s a side by side comparison of the old grey box next to the new blue one. I believe the grey box is 18 cu. inches and the blue one is 20 or 21 cu. inches.
The box was then rewired as before and since I had the go ahead to device out the project, I reinstalled the GFCI outlet.
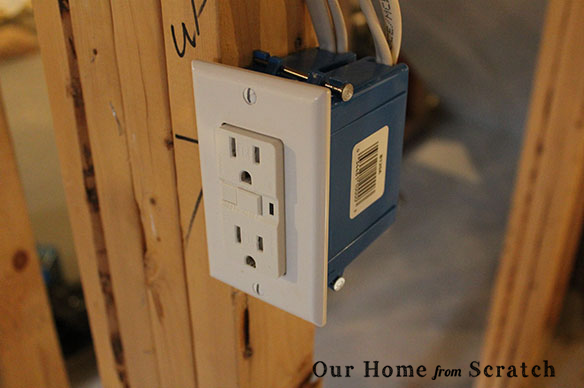
With the basement outlet wired, I installed my garage outlet, turned the power back on at the breaker and checked to make sure the circuit worked okay. That’s it for the electrical portion. In a few weeks, I’ll call the inspector back for the final inspection.
Now let’s take a look at the workbench charging station.
The only other outlet we have in our garage is on the far wall so any battery chargers for cordless tools had to sit on the floor, which wasn’t terribly convenient. Getting them off the floor and onto the workbench was the goal.
I started by picking a spot on the workbench where my chargers would be located then drilling a hole in the workbench top with a hole saw.
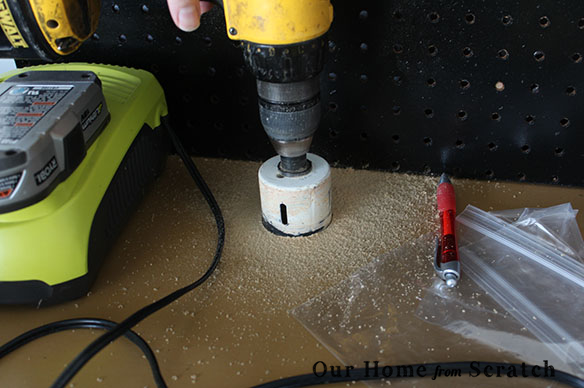
I ran the charger power cables through the hole so the top will be less cluttered.
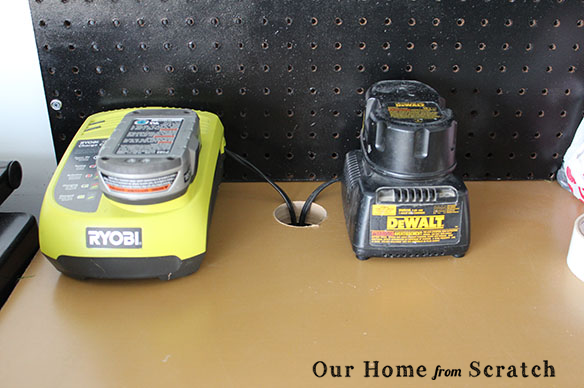
Next, I mounted a $5 power strip I bought at Lowes to one of the legs of the workbench. Then I just zip tied all the cables together and plugged them in.
So now all I have to do is flip the red switch on the power strip whenever I want to charge my tools. I also looked into buying one of those 10-12 outlet benchtop power strips instead. That’s a great option too, but it was $30 and I thought this option would be more a little more practical. $25 cheaper isn’t a bad thing either.
We are fast approaching the end of our summer long garage improvement series. We only have a couple projects left: adding another application of epoxy to the garage floor and painting the interior door and steps. There are a few yard projects I also want to knock out before we get into October, but we’ll go more into those in another post.
How are you wrapping up your summer? Are you looking forward to Fall or are you desperately hanging on to every last summer day like me? Bought any pumpkins yet?


