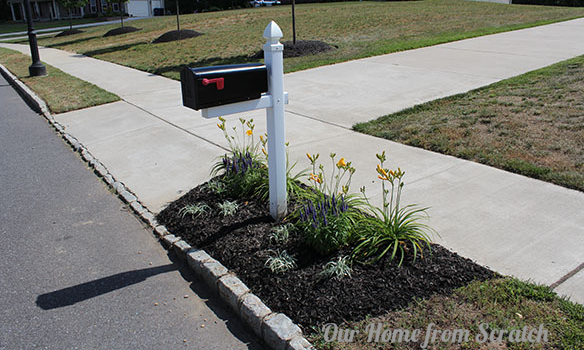
So even though we haven’t officially hit the summer season yet, we’ve already managed to finish one of the projects on our Summer To-Do List. Our mailbox flowerbed overhaul is all done. Only thing left to do is water it everyday for the rest of my natural life. Yay!
Last week we showed you how we spray painted the mailbox and you even got a sneak peak of the planted flowers. A couple days ago I put the finishing touches in place by adding a little bit of weed blocking fabric and some black mulch. Here’s the prequel…
We started with a grassy area around the mailbox.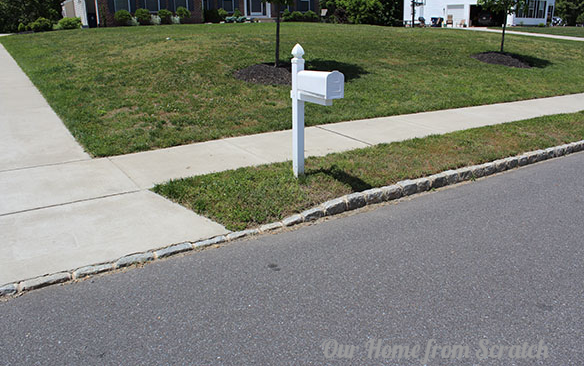
I used a flat edging shovel to remove the grass. This was the hardest part of the job.
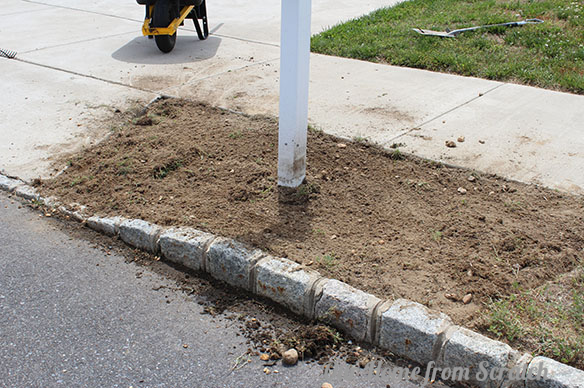
You definitely need to use the proper shovel for this work. A regular spade shovel may work, but it’ll take longer and just frustrate you. Use a shovel like the one in the photo below. I bought that one at Lowes a while back. It’s a Kobalt brand and it works beautifully. When you use this type of flat shovel, you hit the grass from the side and basically scrape it off in sod-like chunks. The grass comes out in little sheets or sections, which are perfect for plugging any sort of holes or bare spots in the yard.
With the grass removed, I worked in about 3 cubic feet of topsoil and leaf compost that I had bought in bags at the nursery right into the area I was going to be planting. Adding quality soil will help keep the flowers alive especially since our soil is pretty much garbage. Now the ground is ready for the plants.
Time to stage the flowers. Lisa used the potted flowers and played with the arrangement on the pavement before settling on a layout. Then it’s just a matter of positioning the flowers in the bed and digging holes.
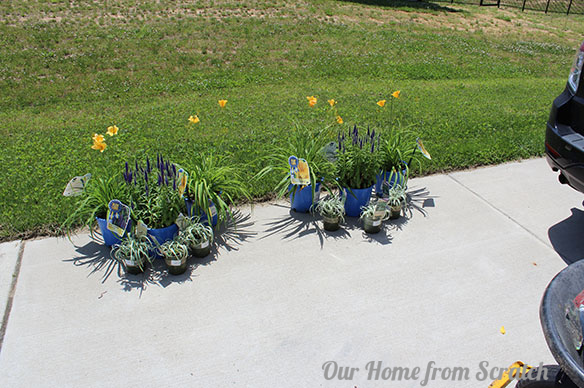
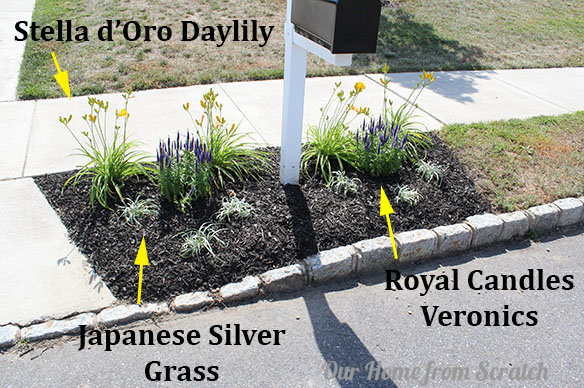
We chose a Stella d’Oro for the rear most flower since it has some height and blooms all summer. The purple flowers are Royal Candles Veronica, which are somewhat shorter and the small guys are Japanese Silver Grasses. All of these plants were marked as ideal for dry areas and a good amount of sun exposure. We don’t have a sprinkler system in the grass or anything that close to the road, so they aren’t going to get any water unless it rains or we water them ourselves. The rest of our flower beds do have a drip irrigation system hooked up though, thankfully.
We were also mindful of the height these plants will reach at maturity. We like the varying heights they have now and we don’t want the grasses in the front to tower over the others down the road. We don’t mind them growing, we just want them to grow proportional to their current heights.
We also tried to keep them spread apart. It sure looks like we could’ve squeezed in some more plants in that space, but we don’t want them to get overcrowded once they get bigger. Learned that lesson the hard way. One of our side flower beds is currently a jungle.
After I dug each hole, I would take the plant out of it’s temporary pot and slice off about half of the root system. I heard this trick stimulates the roots and helps the plant get settled into its new location.
When all the plants were in the ground, I used about a six inch wide strip of weed blocking fabric along two sides. I could’ve used more and really integrated the fabric throughout the bed, but I only have grass on one side of the flower bed. Plus, it was easier, it was 90 degrees out and I was tired and lazy. All good reasons.
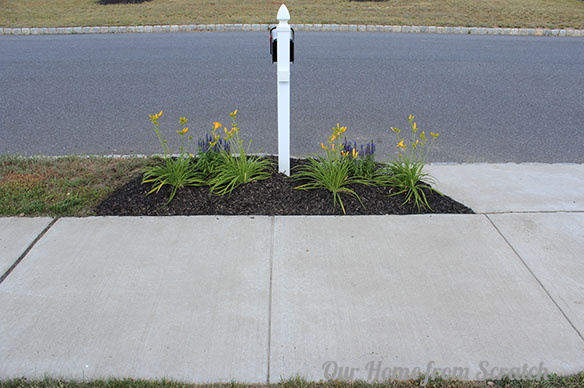
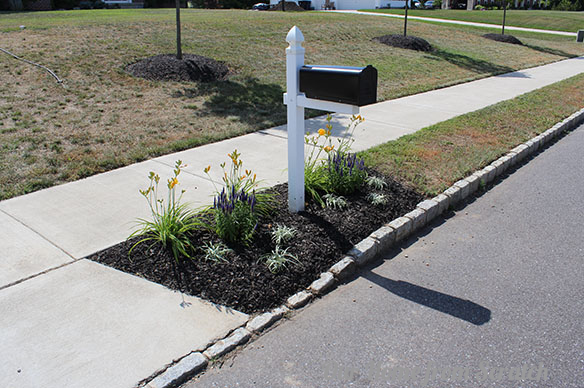
Here’s what the flower bed looks like now…
Hopefully we’ll be able to keep them alive.
How was your weekend?


