Another planning post? Yep. We do a lot of planning around here, if you haven’t noticed. I was itching to get started on actually cutting some lumber this weekend for our built-ins, but alas, it will have to wait until tomorrow. I did buy all the poplar I’ll need for face frames though, so expect a post on that very soon. In the meantime, I want to show you how I planned out the face frames.
So, if you don’t know what a face frame is, here’s a quick primer. Face frames are a thin frame of wood, usually 3/4″ thick (or 1 x, also called “1 by”) that is attached to the front of cabinet boxes. Face frames aren’t necessary, they’re usually just a style feature and they’re much more common in the US. Most European cabinet makers don’t use face frames at all, they just use the plywood boxes and doors. Ikea cabinets are European style.
Here’s what our cabinets look like. Our face frames are made from 3/4″ thick, stained cherry wood. The doors sit over the cabinets when they are installed and are referred to as “full overlay.”
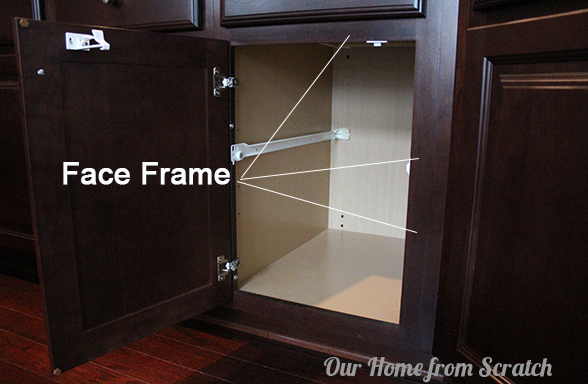
Here’s a side shot…
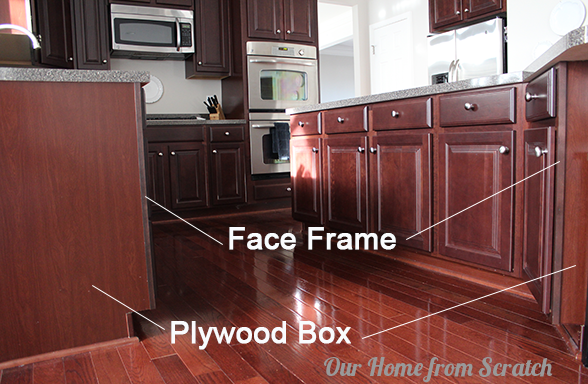
That darker strip in the front of the cabinet is the face frame. The rest of the cabinet is just plywood that has a thin, cherry wood veneer that’s also been stained. The face frame is almost always made from solid wood and not plywood.
So now that you know what a face frame is, here’s what a cabinet looks like without one:
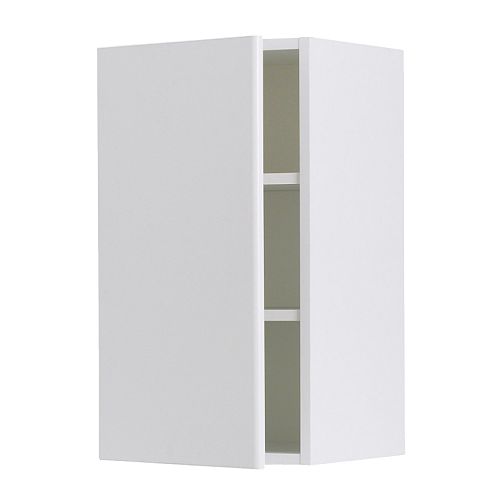
It’s just the plywood or particle board and the door. The edges of the plywood are covered with a thin veneer to hide the exposed particle board. When the door closes, you don’t see any of the edges of the box, just the sides.
So now you know what face frames are. You could make a built-in without the face frames, but since we love the look of them, we’re going to stick with them.
Now let’s talk about material. We’re going to paint this project when we’re done with it. My favorite lumber to use for paint grade projects is poplar. It’s relatively inexpensive and is easy to work compared to other hardwoods. Pine is also a good pick, but it’s softer than poplar and therefore will show more wear and tear over time. Pine also tends to have knots in it unless you buy the high quality stuff and those knots can bleed through several coats of paint. I’m not sure how much cheaper pine is than poplar, but if it’s close and in your budget, POP for the poplar. I should trademark that.
If you prefer the look of stained wood, then avoid the poplar. Go with either an oak, maple or cherry for a stained application. Only downside to the stained versus paint that I can think of: the cost. The stain grade hardwoods are more expensive than poplar or pine. Moreover, you’ll need a matching veneered plywood to match your hardwood. Guess how much cherry veneered plywood costs? Not cheap.
Now let’s get down to our face frame designs. I made two separate face frame drawings in addition to our overview drawing, one for the top face frame and one for the bottom. I’m using these to figure out the dimensions I’ll need for the lumber. I’ll take those dimensions and come up with a shopping list.
Let’s start with the bottom unit.
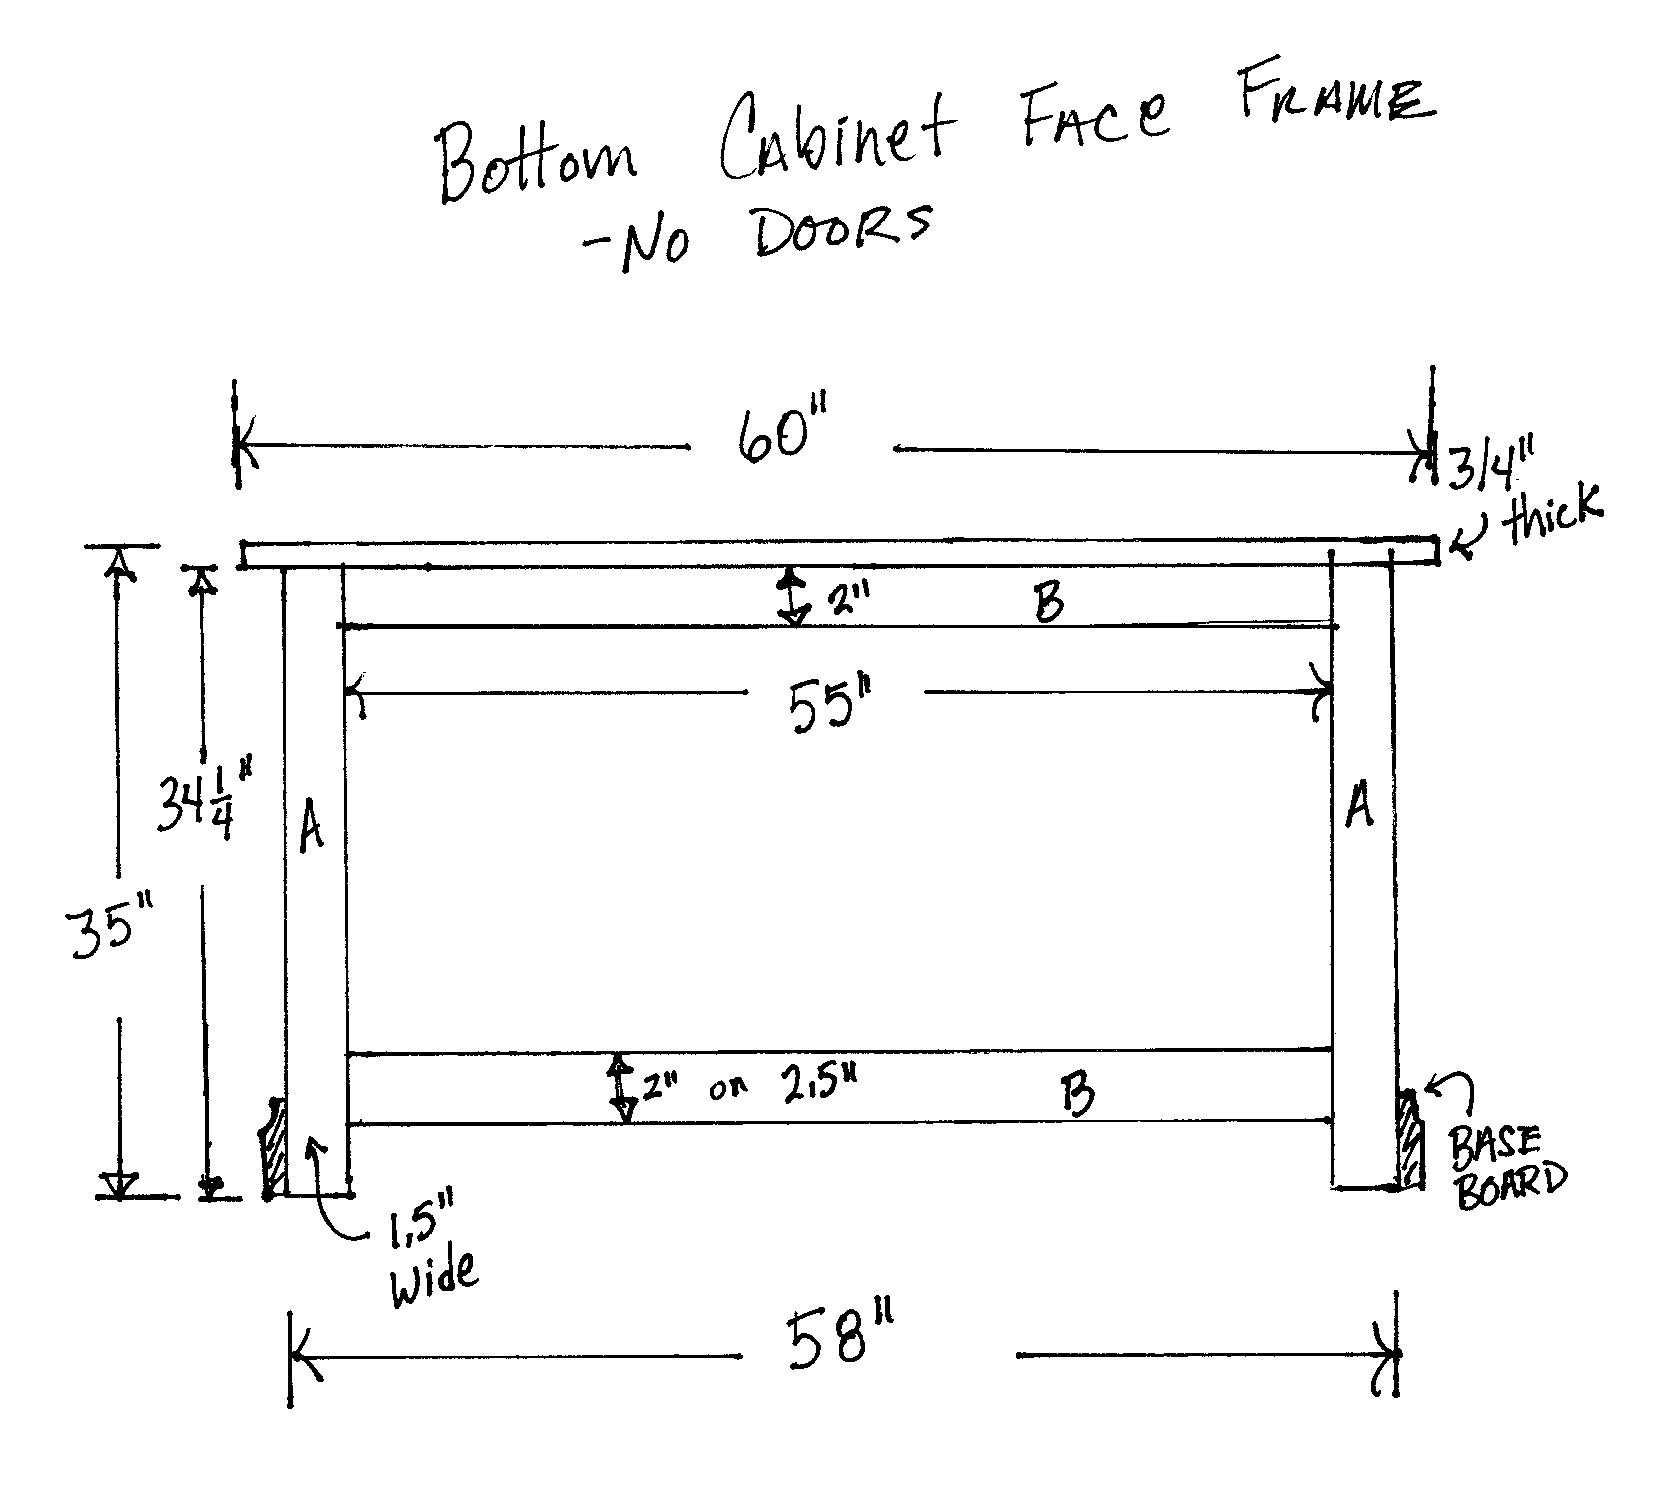
Ok, so let’s dive into this drawing. First thing you may notice is I’m not adding the doors yet. We’ll do those later. Starting at the top of the drawing, we’ll have a 3/4″ plywood counter top. I want the counter to extend an inch out in each direction past the base cabinet. I also want the maximum width of the whole built-in to be 60″. So, we can subtract off 1″ from each side (total of 2″) and end up with a base width of 58″. The vertical members, or stiles are marked with an “A”. Those two pieces will be 1.5″ wide. That means the rails, items “B”, are 55″ long. I just subtracted both 1.5″ stile widths out from 58″. The lengths of the “A” pieces are just the max base height of 35″ minus the thickness of the countertop, which is 3/4″.
Why 1.5″ wide stiles and 2″ and 2.5″ rails? Well, somewhat from experience. The kitchen cabinets we made for our first home had 1.5″ stiles and it looked great. The 2″ rail up top sort of balances out the look. The 2.5″ rail on the bottom will partially be covered by the room’s baseboard molding and only 2″ will be visible, the other 1/2″ will be behind the molding.
So that’s the dimensions for the bottom unit. Let’s take a look at the top component.
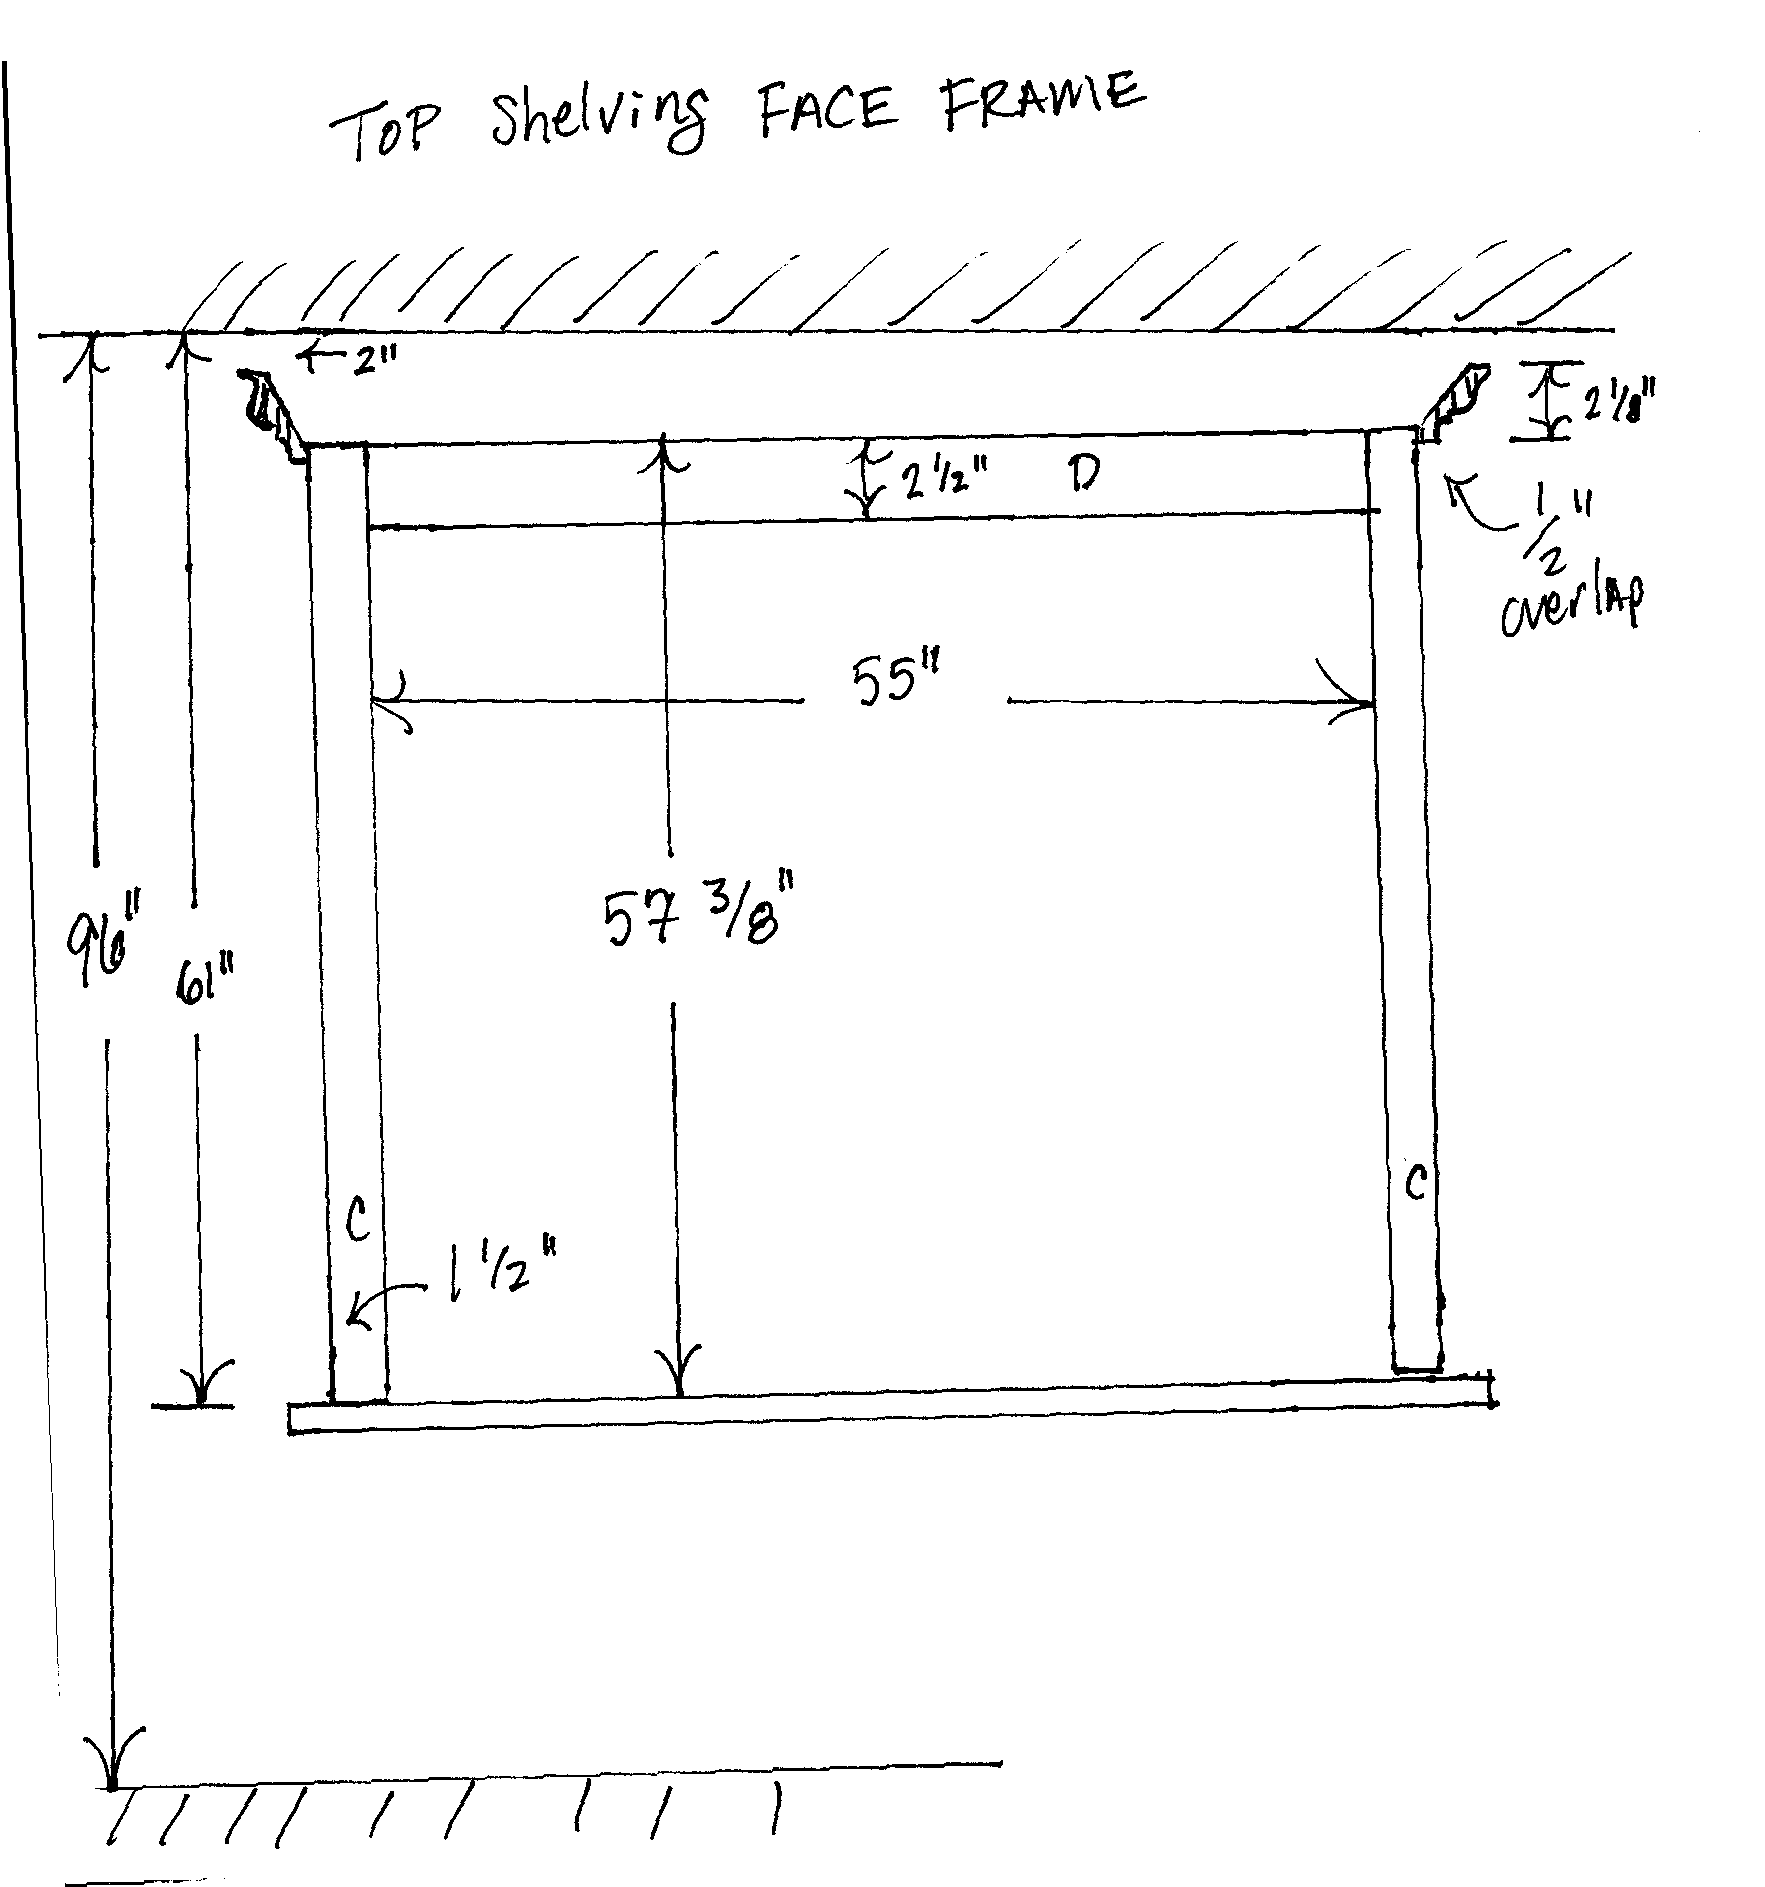
Lisa asked if we could leave a 2″ gap above the highest part of the cabinet. The room has 8′ high ceilings (96″). The top cabinet will sit on the bottom cabinet, which is 35″ high. That leaves 61″ for the top cabinet (96-35). We need to subtract out 2″ for the gap Lisa requested, which leaves 59″. Then we need to account for the height of the crown molding, which in this case is 2 1/8″. Now we’re down to 56 7/8″. I’m going to add 1/2″ back though so we have some meat to nail the crown molding. Now we’re back up to 57 3/8″. So the “C” stiles are 57 3/8″ long. The “D” rail is going to be the same width as the rails on the bottom section, 55″.
So, now I know the widths and lengths of all the pieces in the face frames, which I can use to make a shopping list.
Next up: I’ll show you what lumber I bought and we’ll make the face frames with some pocket screws.
Any questions? Let me know if this makes sense so far.


