*** The plans for this project are now available to our newsletter subscribers. If you’re interested in getting these plans, please sign up for our free newsletter using the opt-in form in this post.***

Happy Monday! Finally some meat instead of potatoes. This weekend I started and finished a work bench I had planned earlier. This table will be the perfect work center for other upcoming projects like our dining room wainscoting and will be a good start to getting our basement organized. I incorporated a Kreg Klamp Trak for easier pocket holes as well. Makes joinery much more convenient. I’m going to try to learn Google SketchUp so I can start posting plans for some project, this work bench being one of them. I also tried to incorporate some of Ethan’s suggestions from his earlier workbench post.
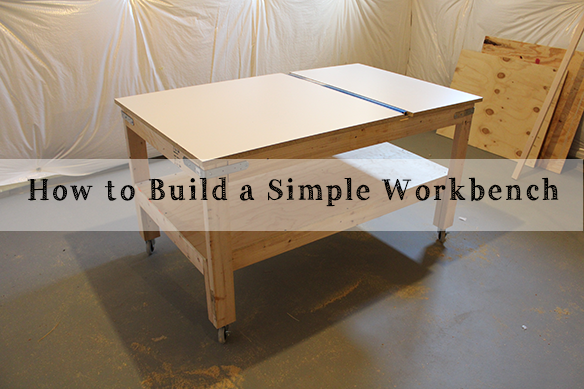
Here’s how to build a workbench.
1. I planned to make the overall width 36″ and the height 33.” I chose a 3″ caster wheel (4″ overall), a 3/4″ melamine top and a 1/2″ plywood sub-top. That leaves 27 3/4″ for the legs. I made my legs out of 2x4s and cut all four to length. To each leg, I added a 12″ long smaller piece of 2×4. I glued and nailed them together.


2. The legs were braced together with 2x4s that were glued and joined with pocket screws. The width of the pieces were determined by subtracting the width of the legs from the overall width of the table and the top overhang (the top melamine piece will overhang the table by 1″ on each side.


3. The longer side pieces were done the same way. The overall length of the table is 60″ with the framing length of 58″ (subtract 2″ from 60). Once the 2×4 legs are subtracted, that leaves 51″ for the side piece lengths. The bottom shelf length is recessed in by 1 2×4 and I used a 2×4 beneath it to support it while I screwed it in.

4. The dimensions for ribs for the top and the bottom shelf were measured right off of the frame. I nailed them into place with a dab of glue for good measure.

5. With the framing completed, it’s time for the plywood. The top will get covered with a melamine, but under that I added a 1/2″ thick sheet of plywood. Since it’s going to be almost completely hidden once the final top is on, I used a lower grade BC plywood, which is cheaper. Since the bottom shelf is going to be seen, I added AC plywood there. Both pieces were glued and screwed into place.

6. Screwed on some caster wheels!!

7. Time for the top. The Kreg Klamp is around 34″ long which fits perfectly in on my 36″ wide table top. Funny thing about this Klamp… I needed special T type bolts to hold it down and I couldn’t find anything that would work. I ended up using toilet bolts!! They were in a pack I never used and they fit perfectly!! To attach the melamine top, I just put down a lot of Liquid Nail (which is the only glue I used on this entire project, btw) and then added screws in from below.


8. Add some corner brackets. These brackets were fairly inexpensive and will hopefully add some durability. That’s about it. Not too hard.


Just to be on the safe side, I’ve added some clamps to really keep the melamine top squeezed down until the glue cures. I’ll pop those off after 24 hours.

Can’t wait to start piling crap onto that bottom shelf and using this table for some projects! How was your weekend? Get anything done?

