So our sliding drawer project is coming along slowly, but nicely. We’ve measured and purchased our wood and we’ve cut it to its width and length. Now comes the tricky part, we’re going to start making the joints and other cut features of the drawers. This can be an intimidating part of the project, especially if you don’t have a lot of experience with a table saw. However, if you take your time and practice on some scrap wood, you’ll get the hang of it pretty quickly.
There are two primary ways to cut the rabbits (or rabbets?). The first involves the normal table saw blade and multiple passes. The other uses a dado blade that’s set to a wider thickness and therefore, fewer passes. A dado blade set is nothing more than a few saw blades stacked together to create a wider cut. They’re only used to make grooves and rabbits and never to cut off a piece of wood. You can buy a stack of dado blades from a hardware store and a decent set will run you around $100. If you ever want to get into making shelves, built-ins or cabinets, they are indispensable. It’s also worth noting that most hobby grade table saws are not capable of using dado blades. It’s something to think about if you’re considering a table saw purchase.
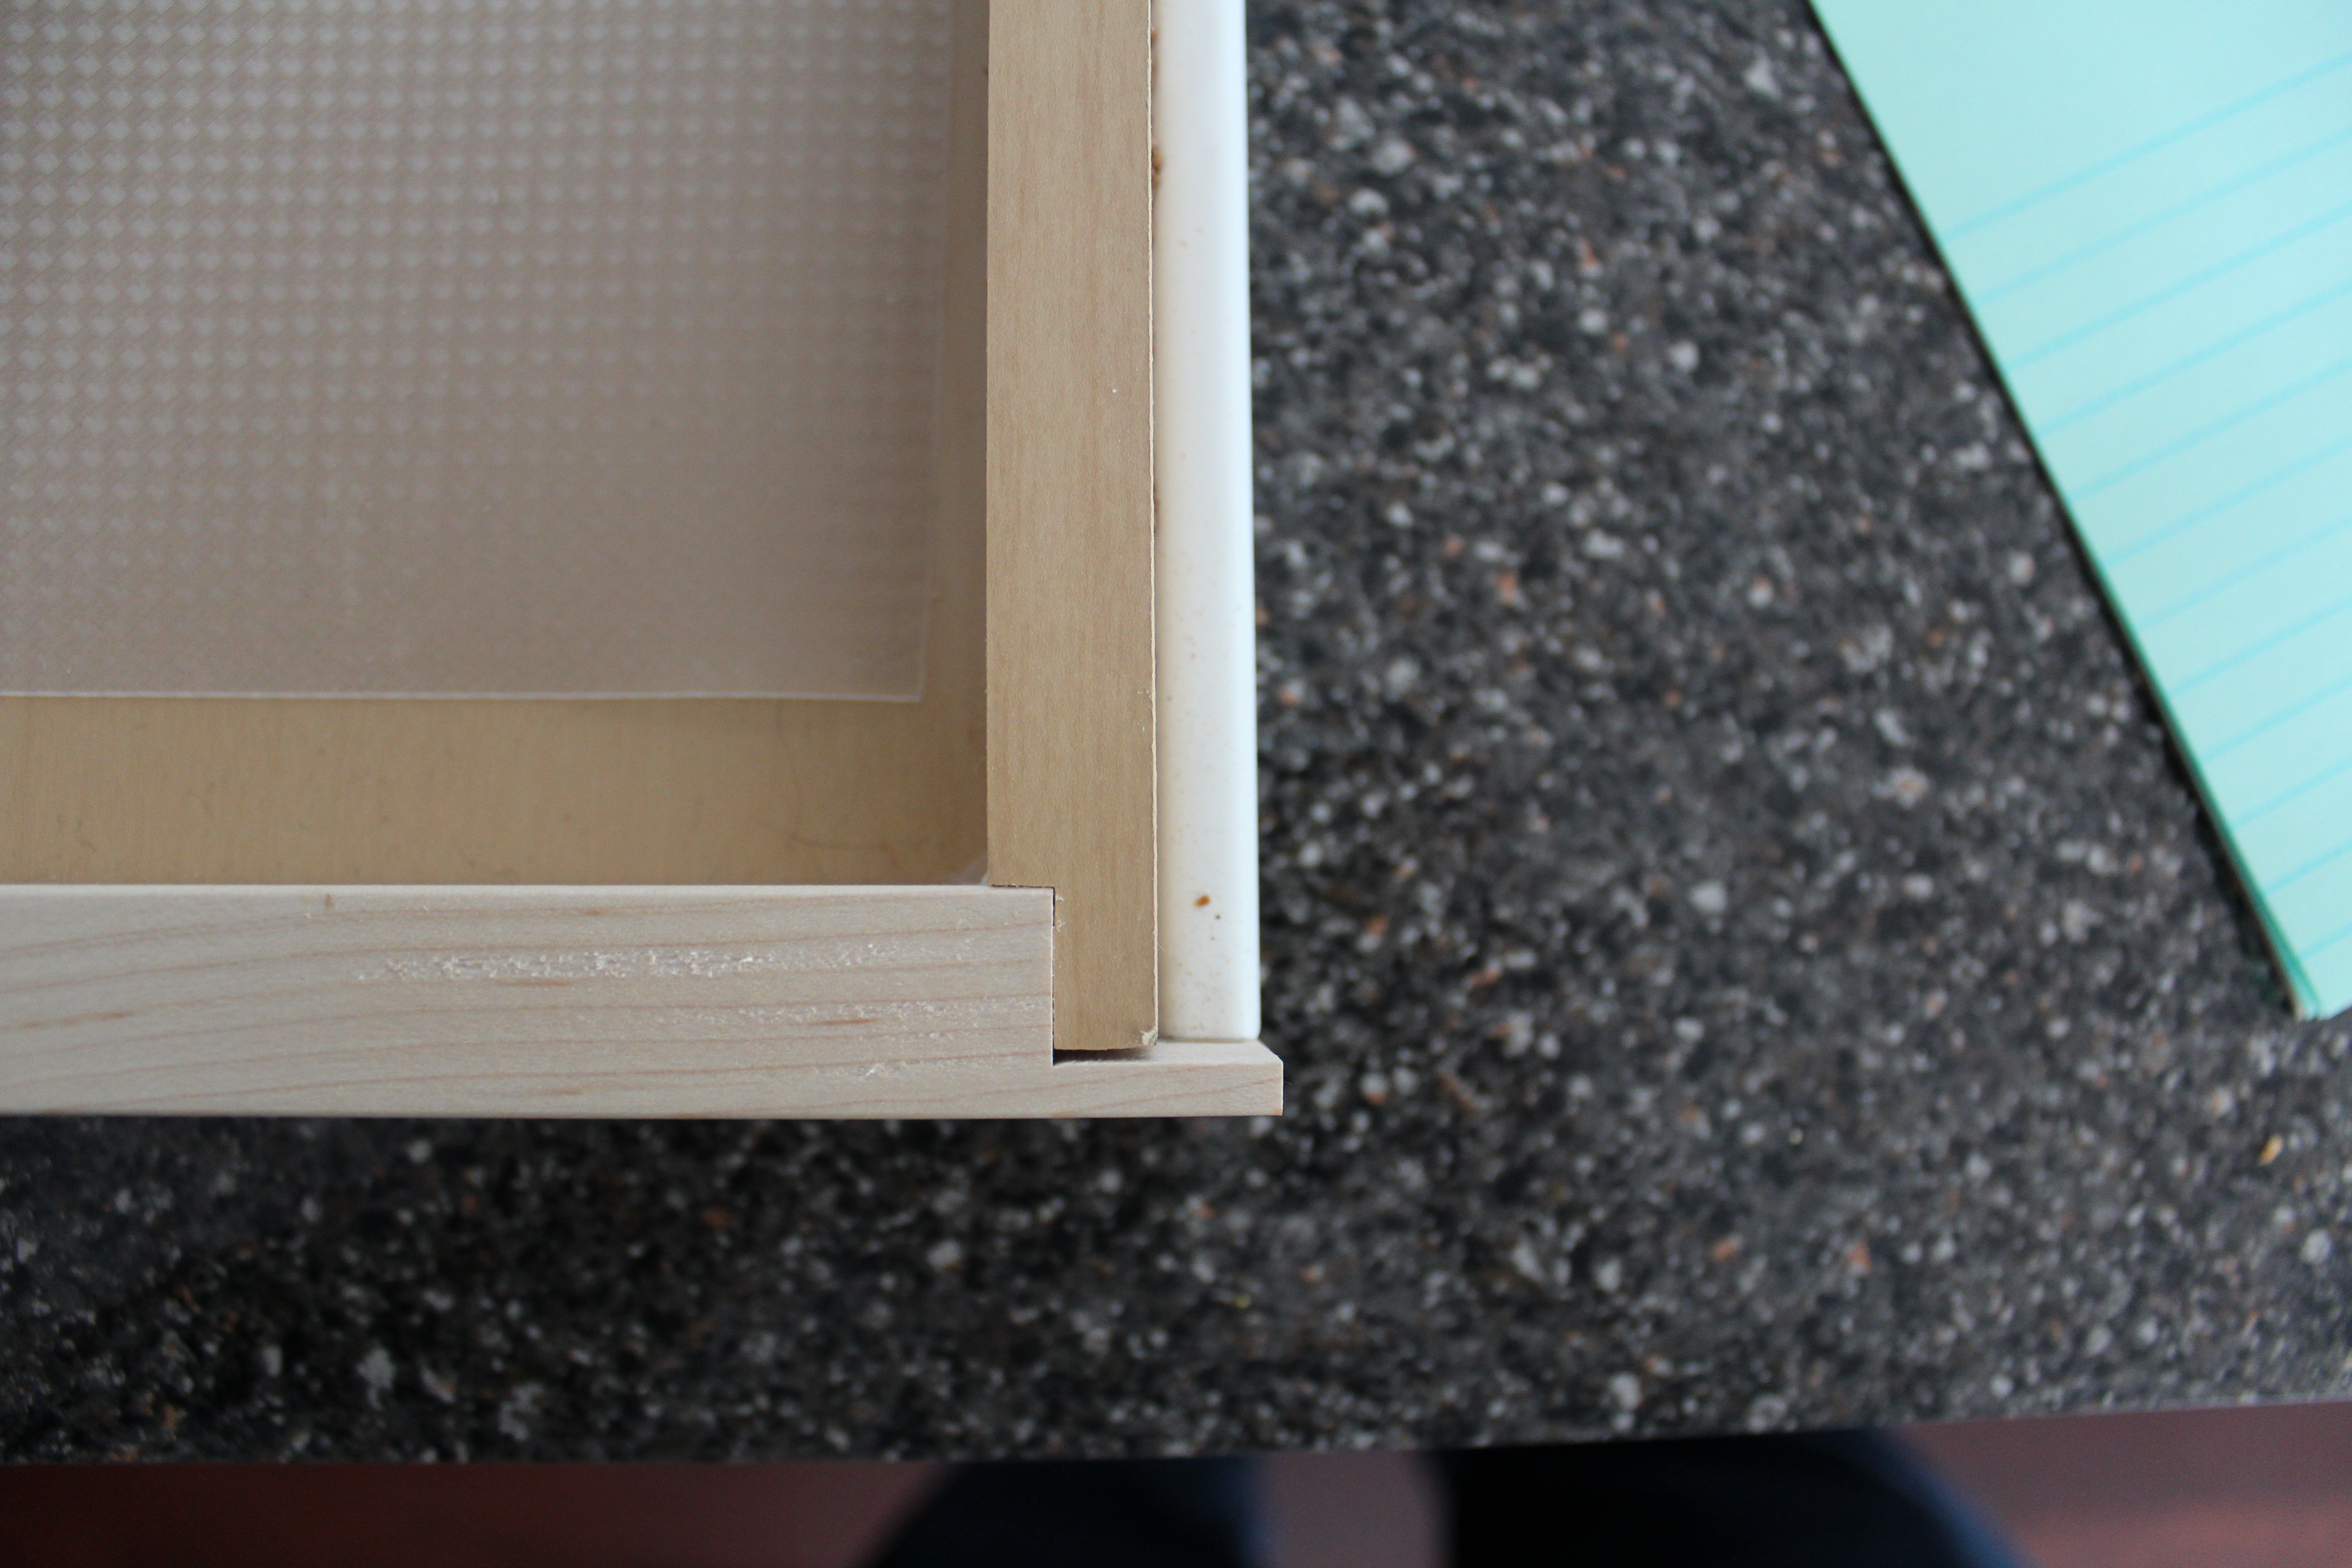
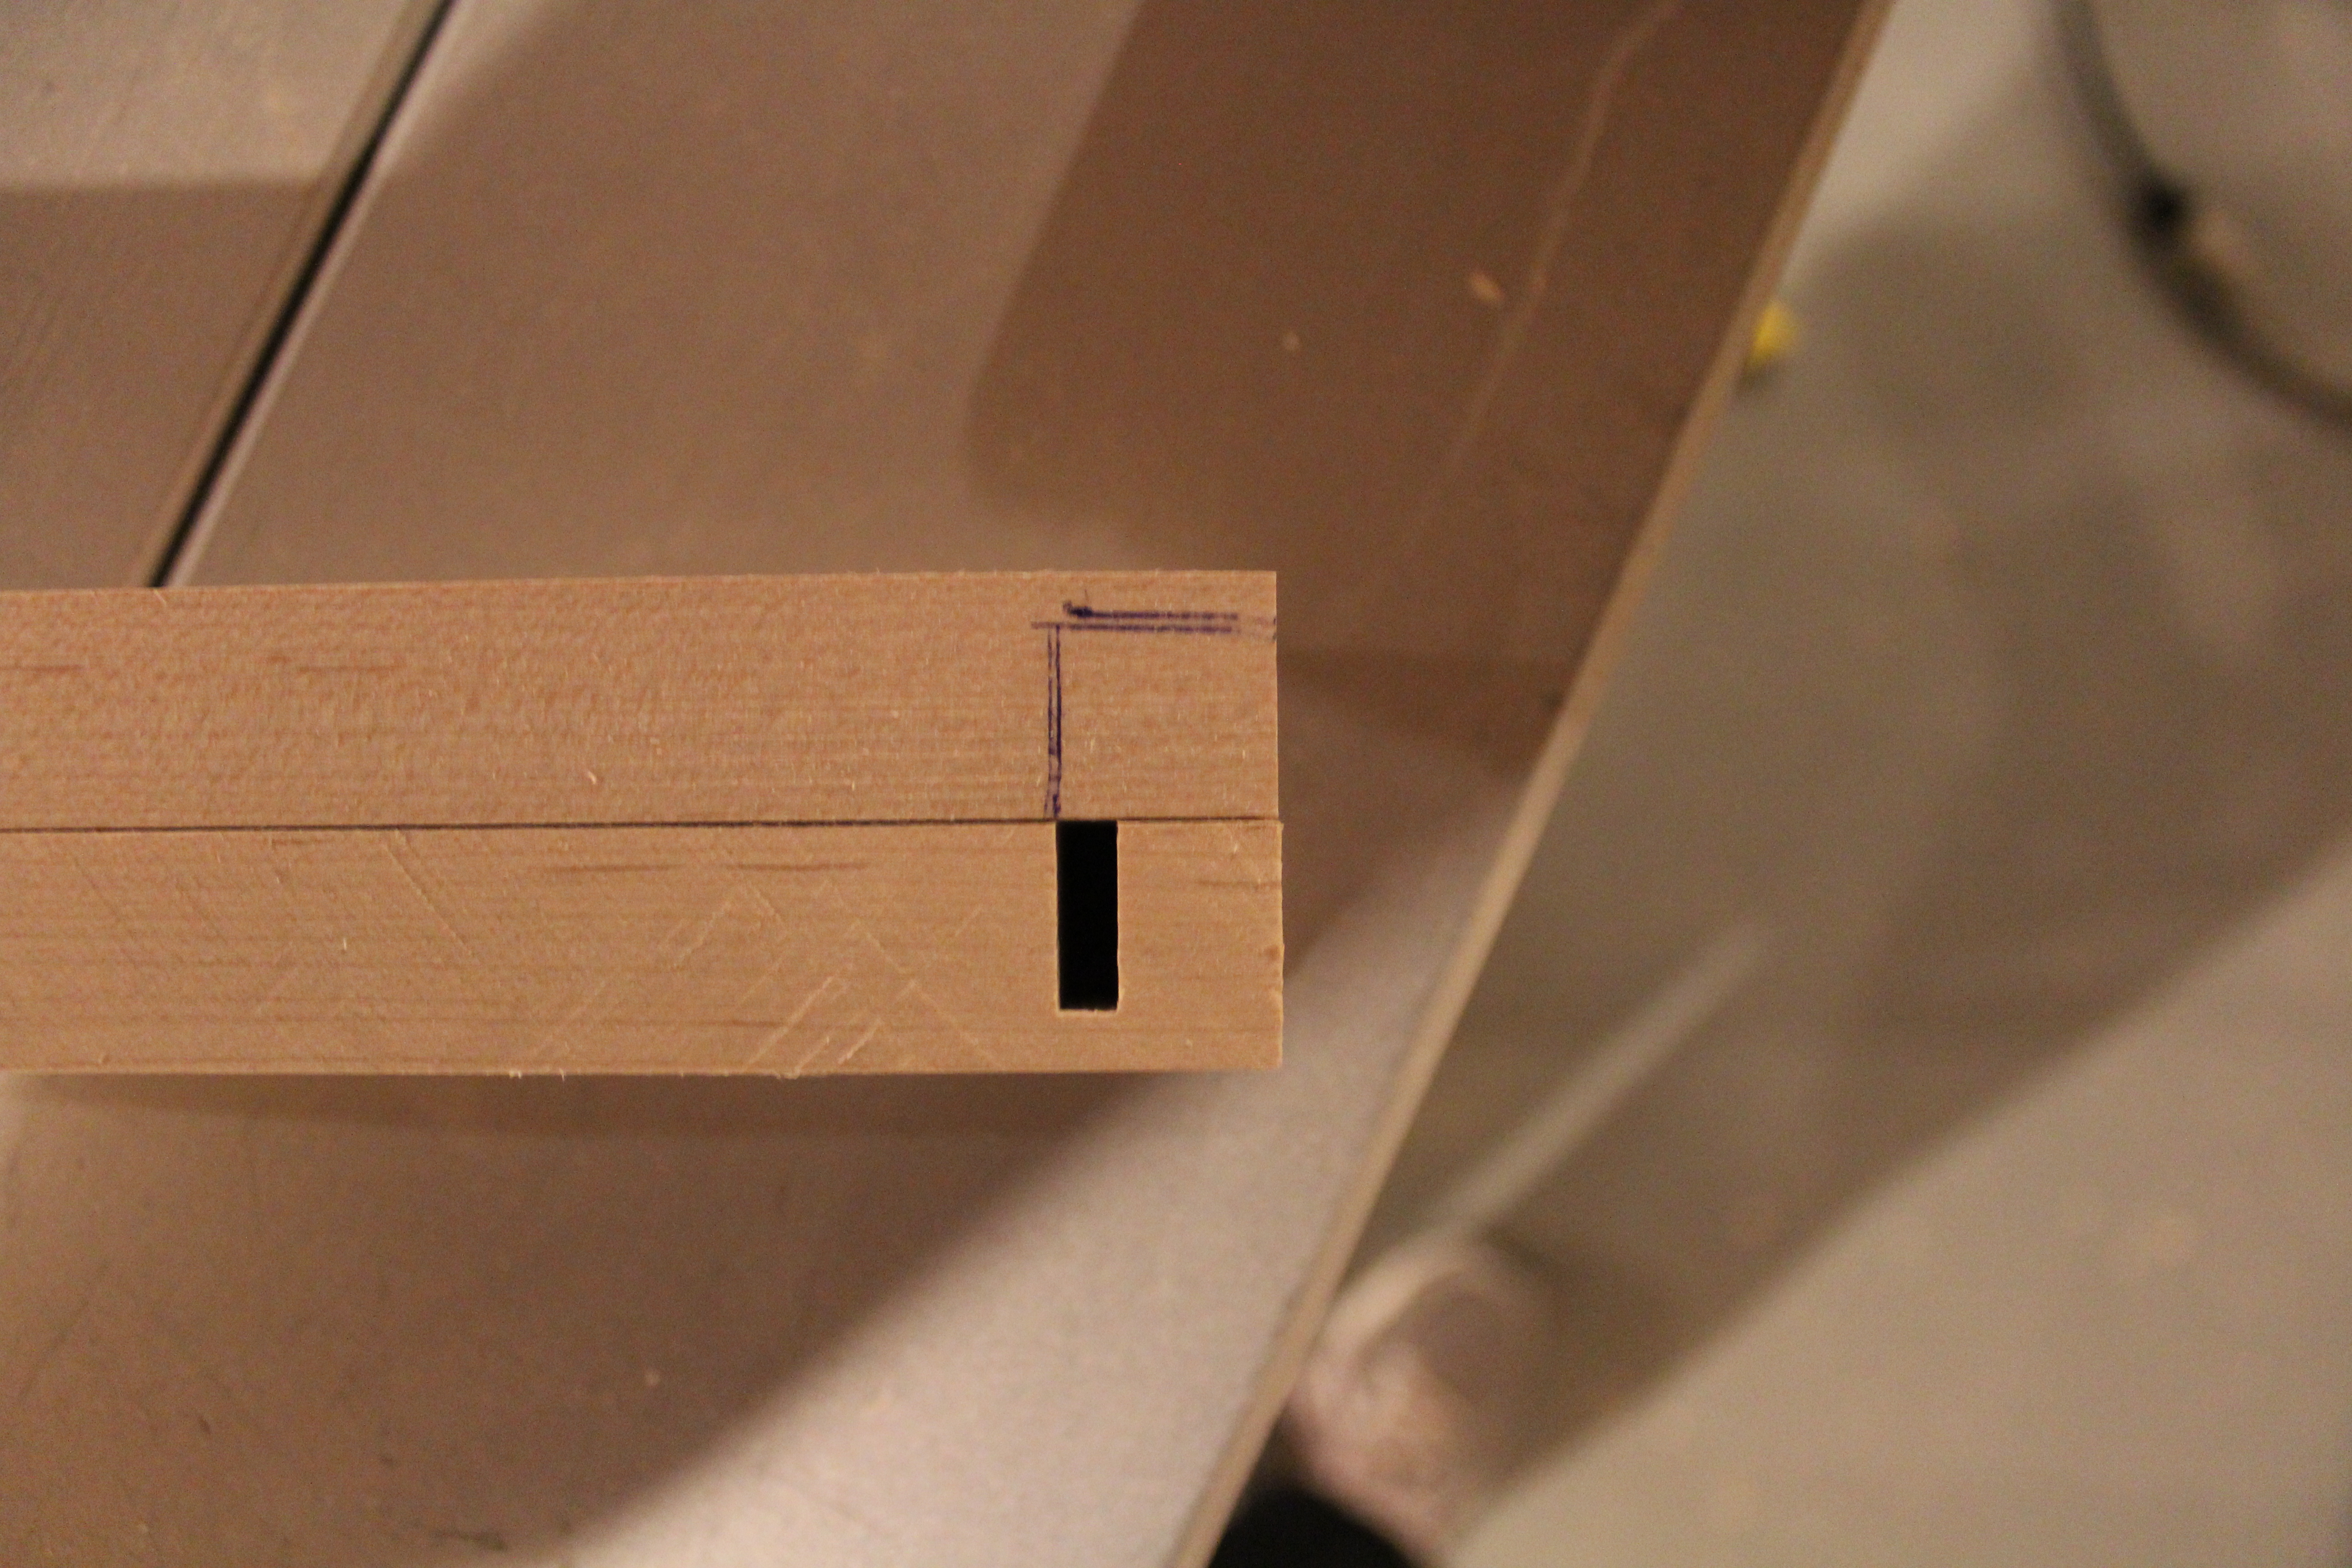
First, I’ll go over the method with a normal table saw blade and then I’ll use the dado blades in the following post. Here’s the joint we’re trying to make on the front drawer piece. The sides will need this cut as well, just with different dimensions.
I used a tape measure to determine how much material is removed from this front piece. Then I transferred that measurement to a scrap piece of wood that’s the same dimensions as my front boards
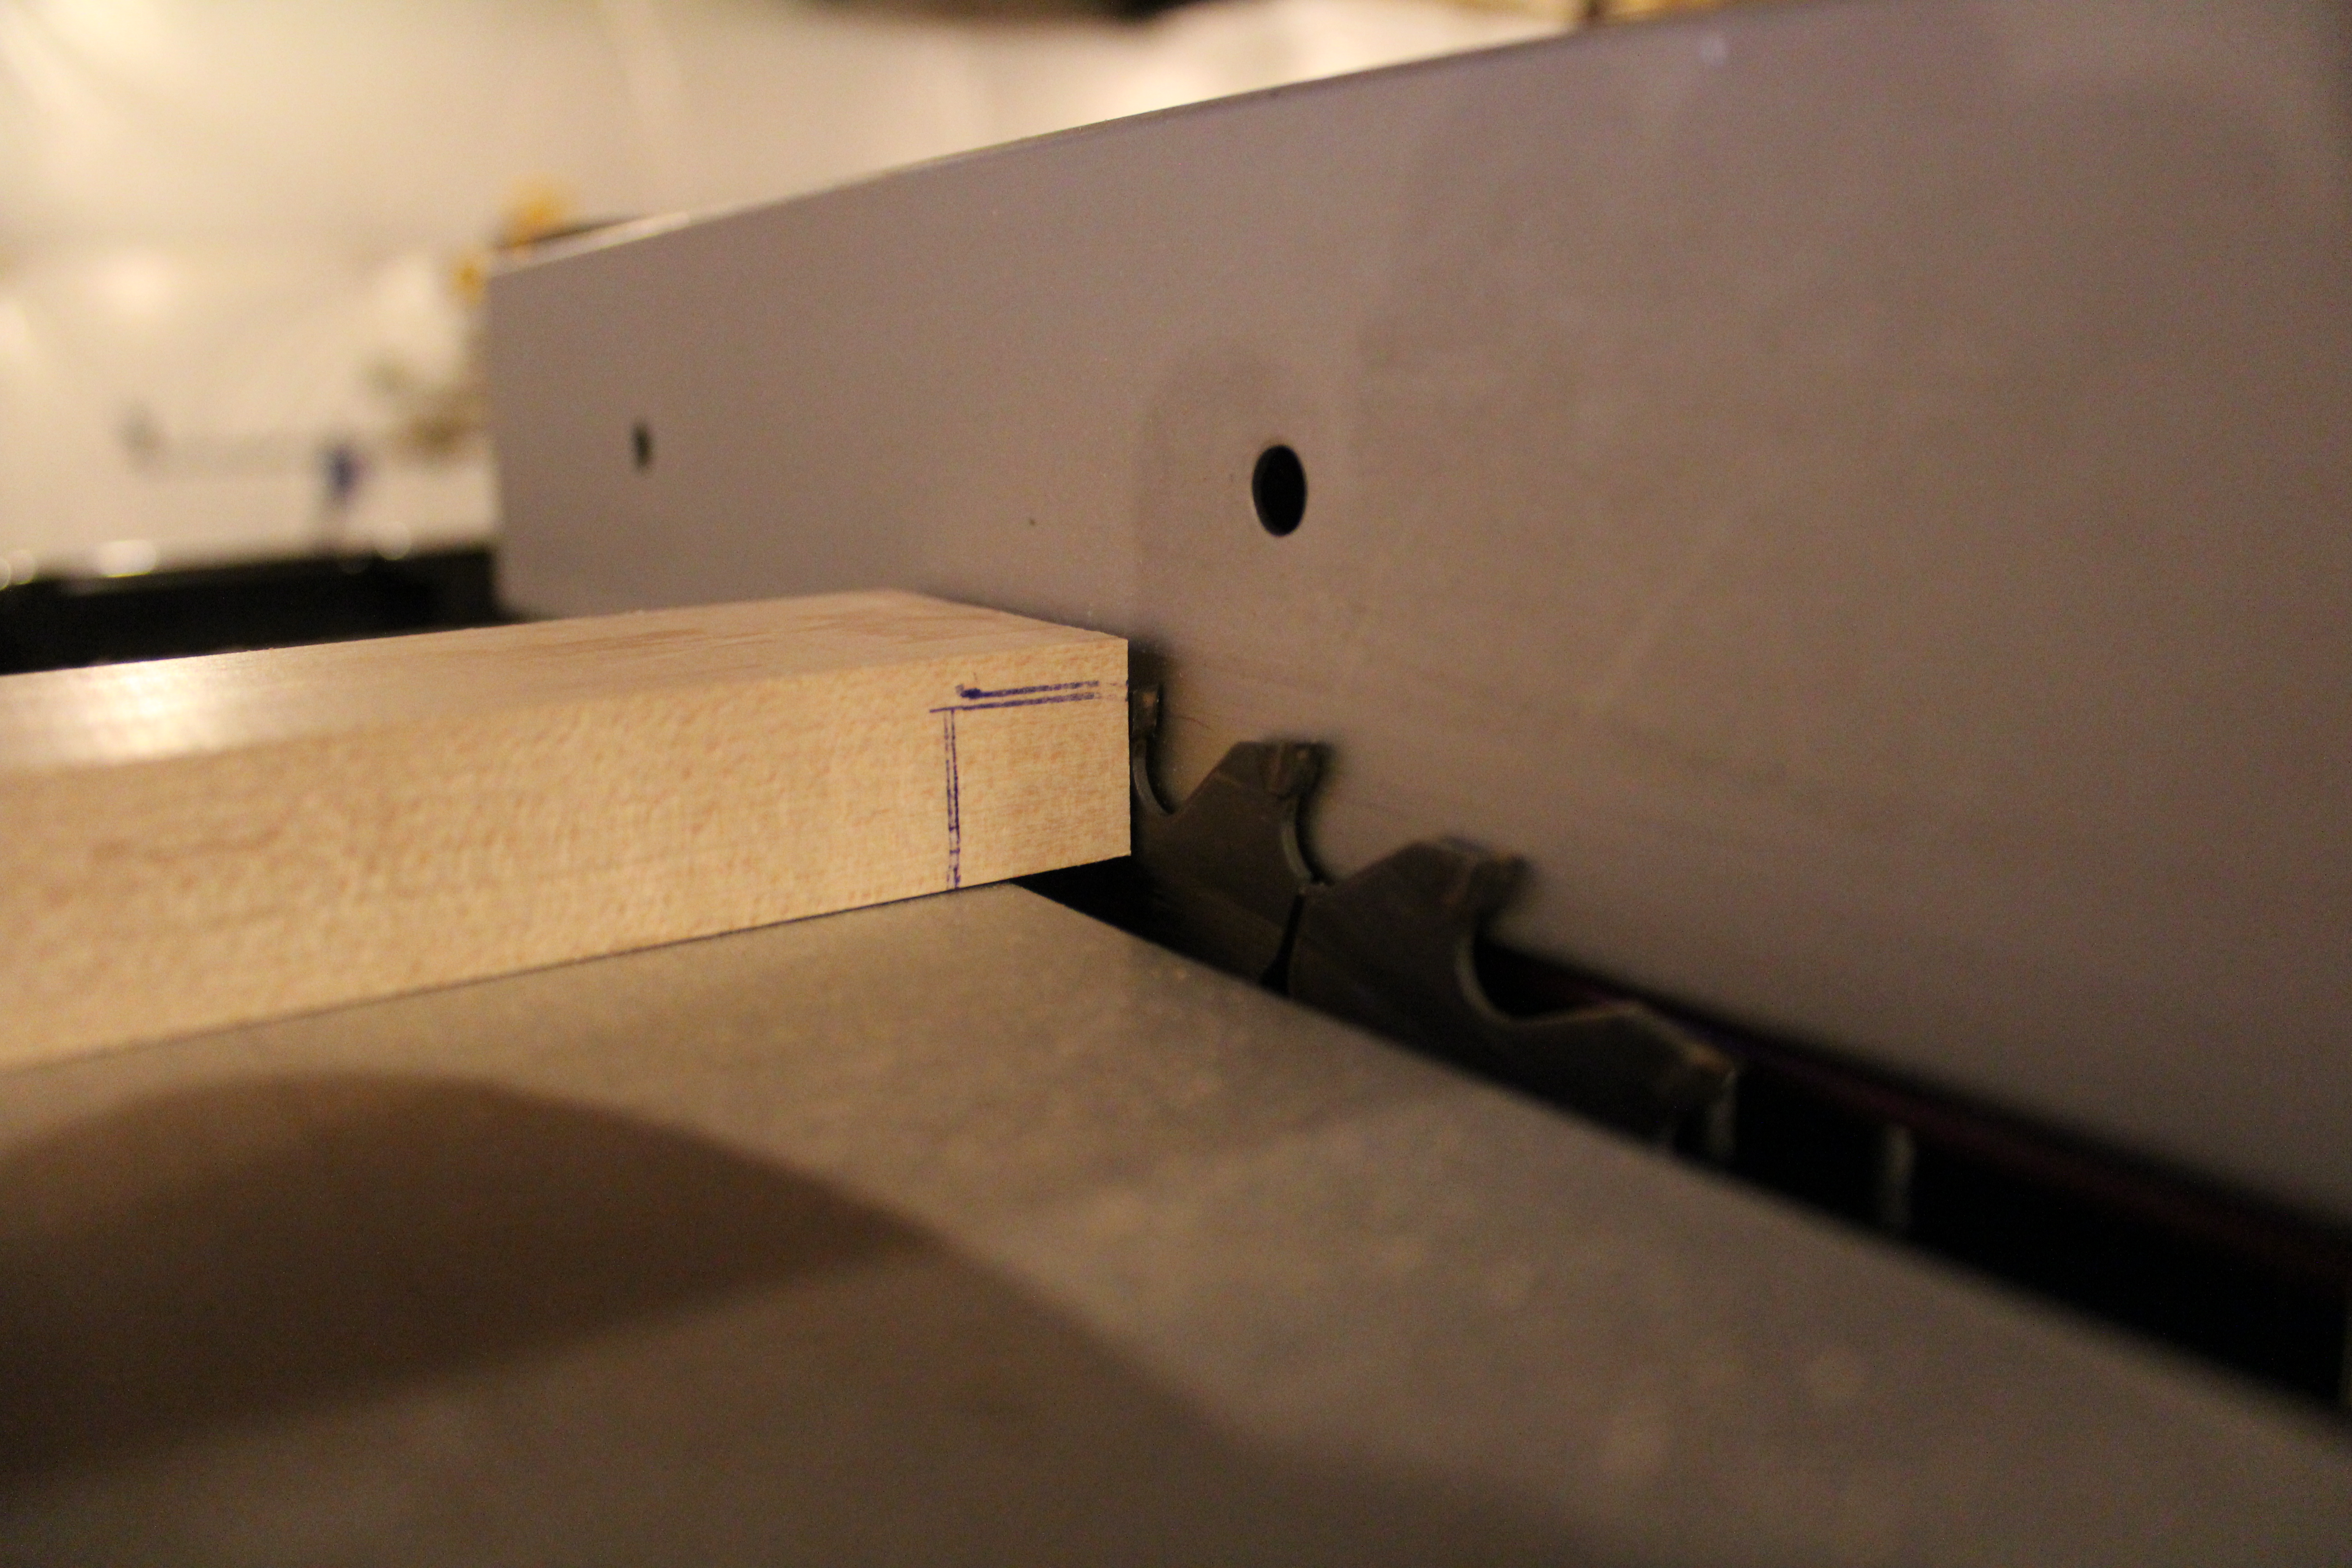
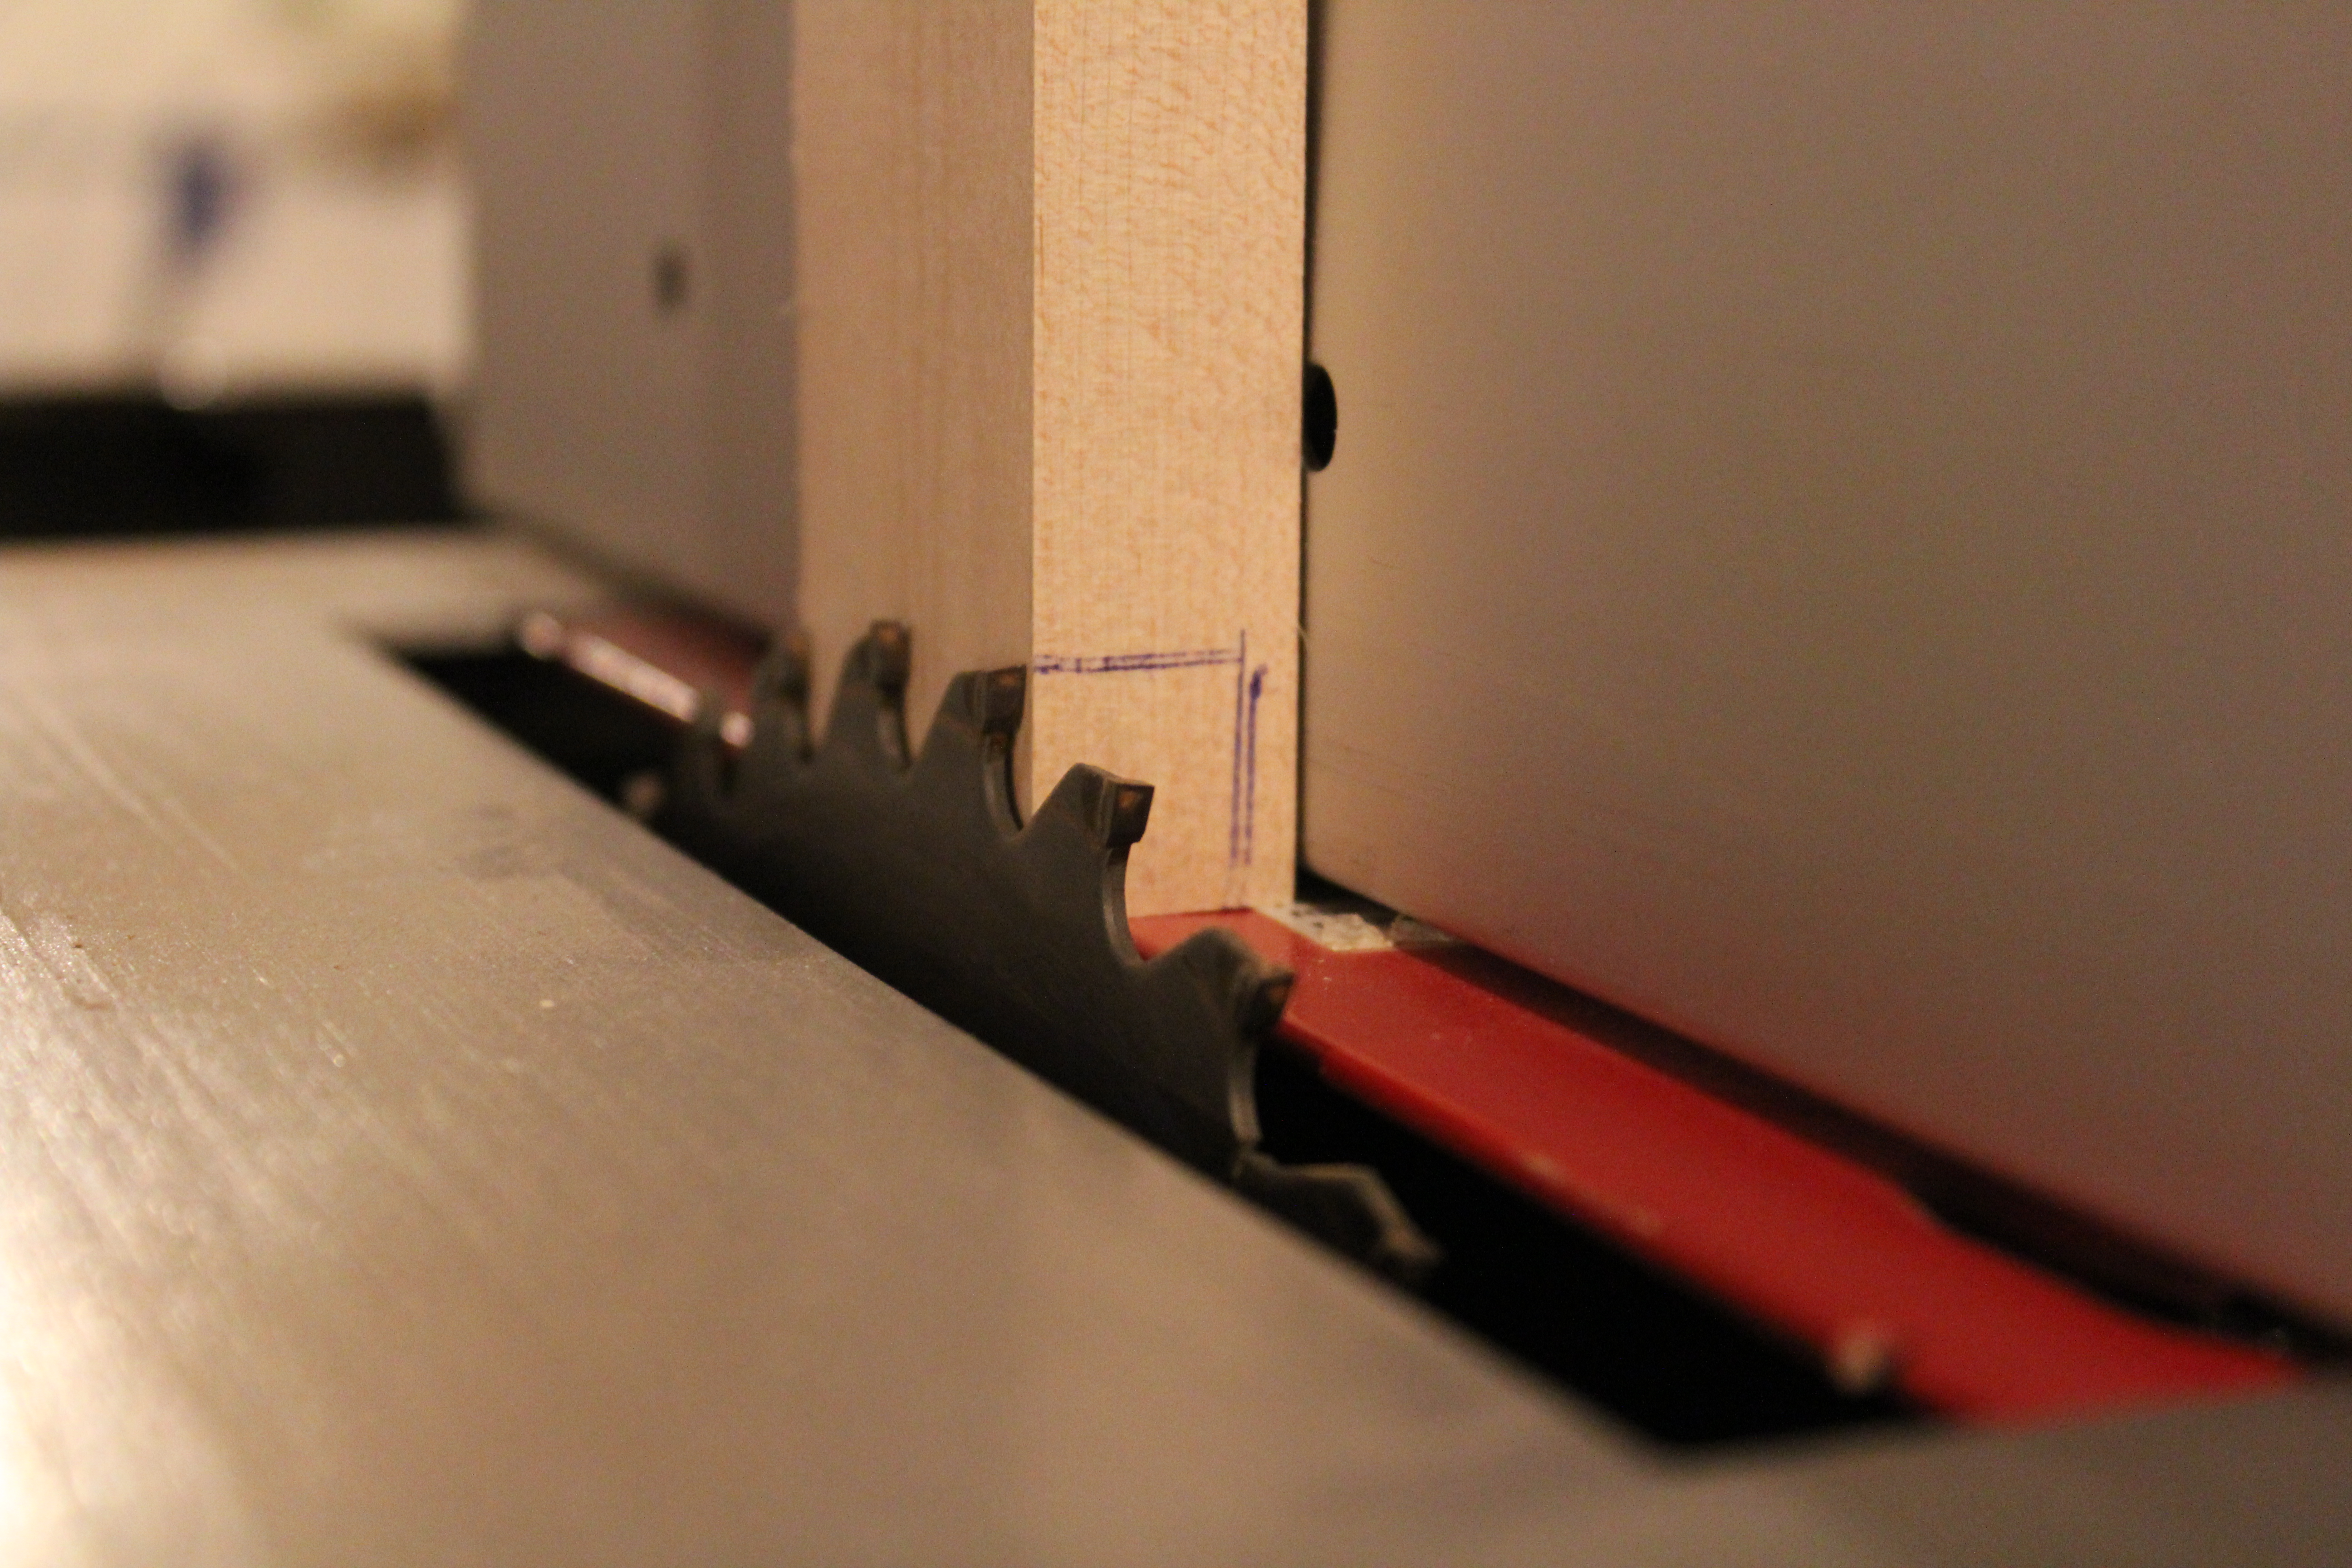
Then I set the scrap board on the table saw and raise the height of the blade just up to the horizontal pen mark. You can only do this at the highest point of the blade and on a blade tip. Simple enough so far right?
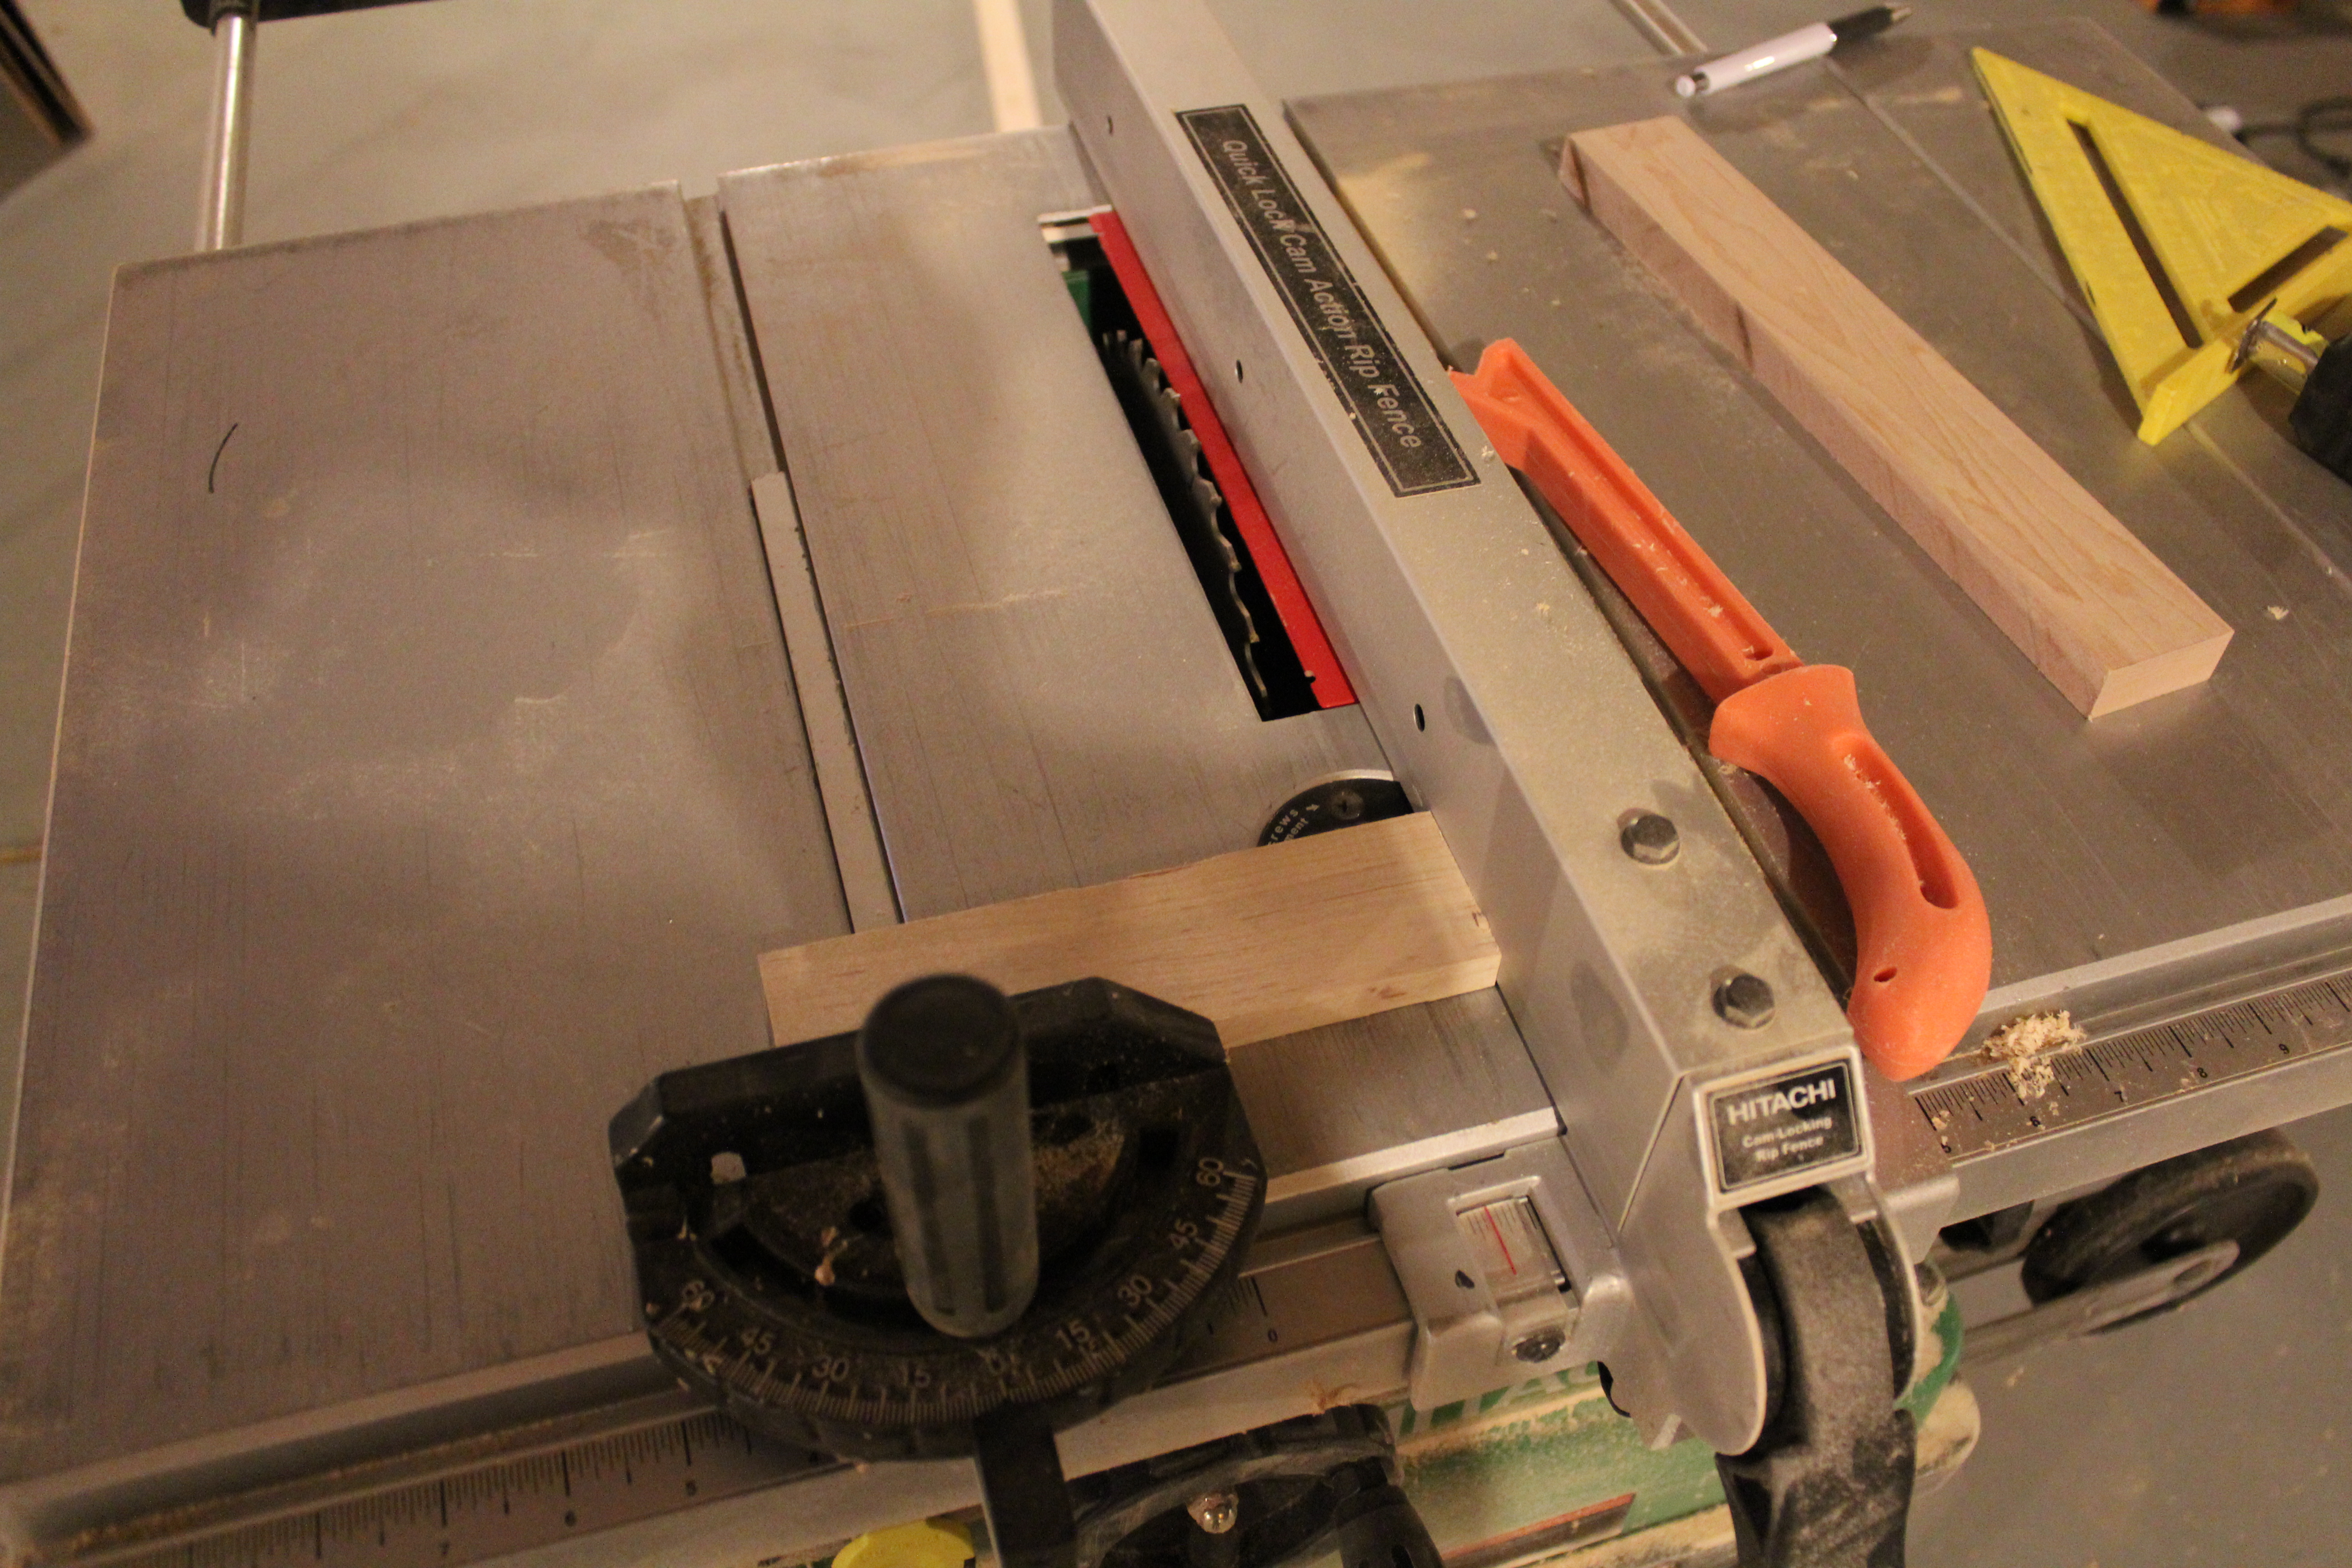
Next I need to adjust my fence to allow only the vertical line and over to be removed.
Now that the fence distance is set, I turn on the table saw and run both sides through. I’ll use my miter slide to guide the piece through. I also have to keep the board flush to the fence.
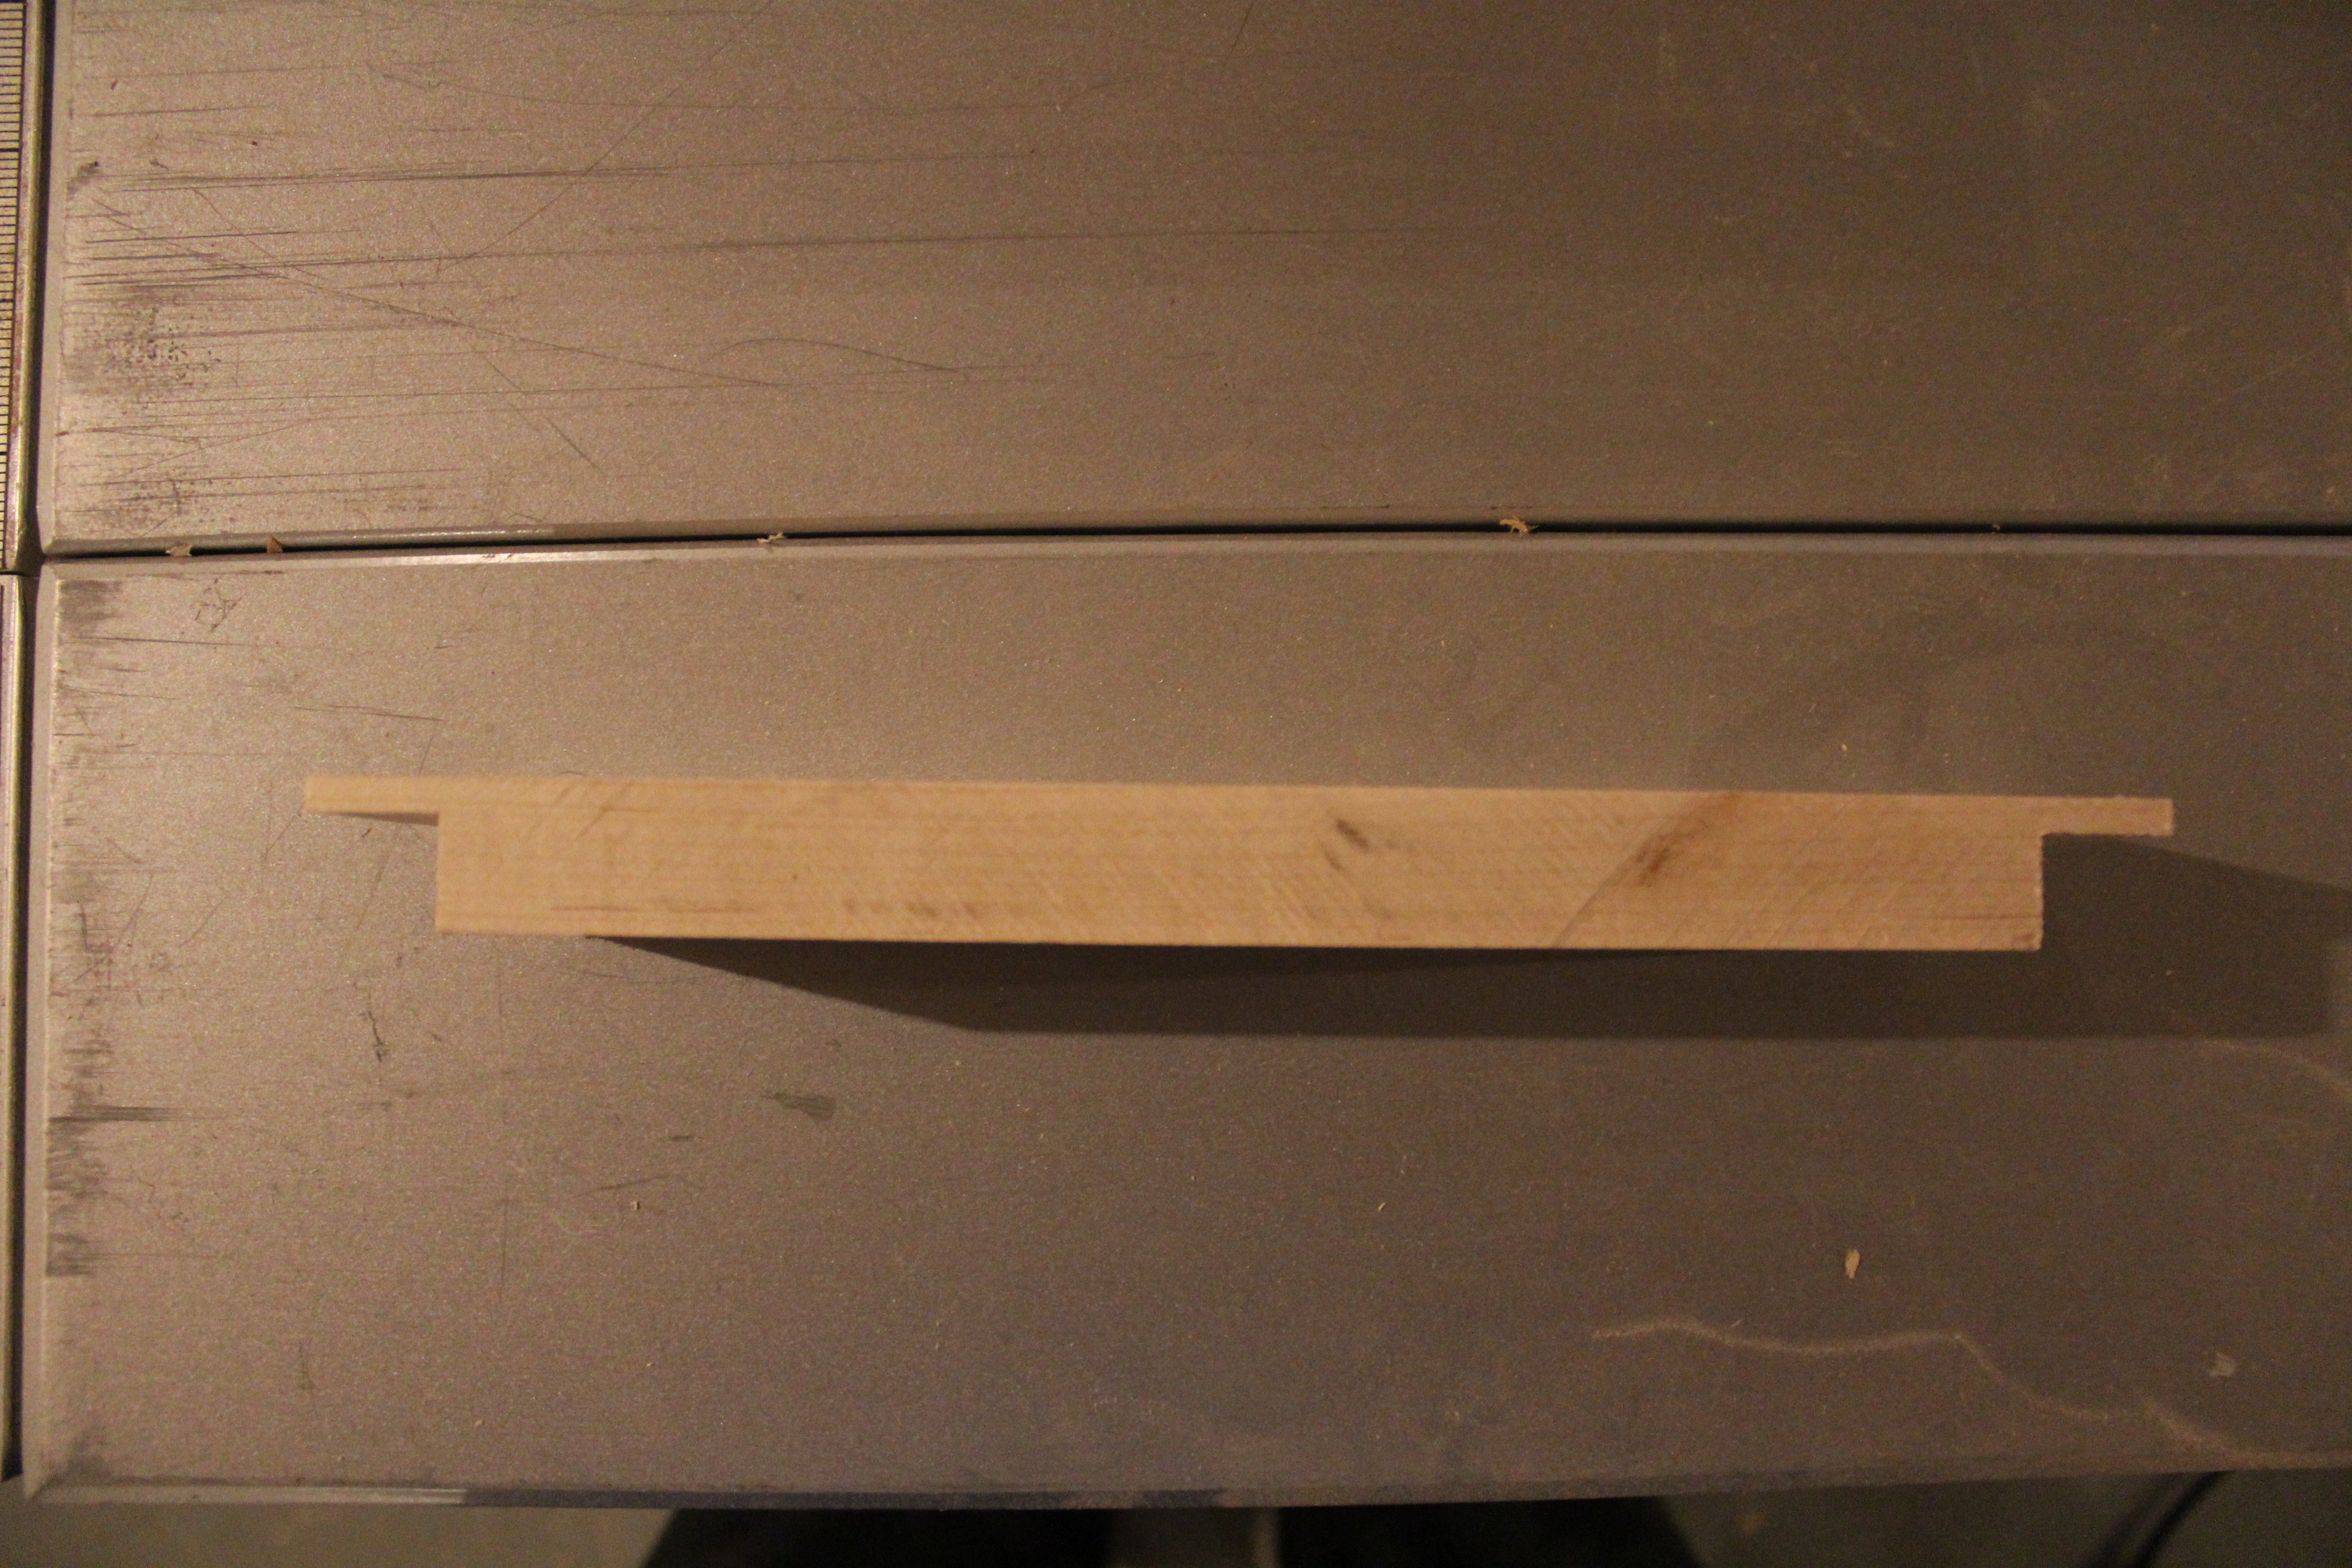
After the first try, I compare my freshly cut scrap board to another scrap that I also marked up…
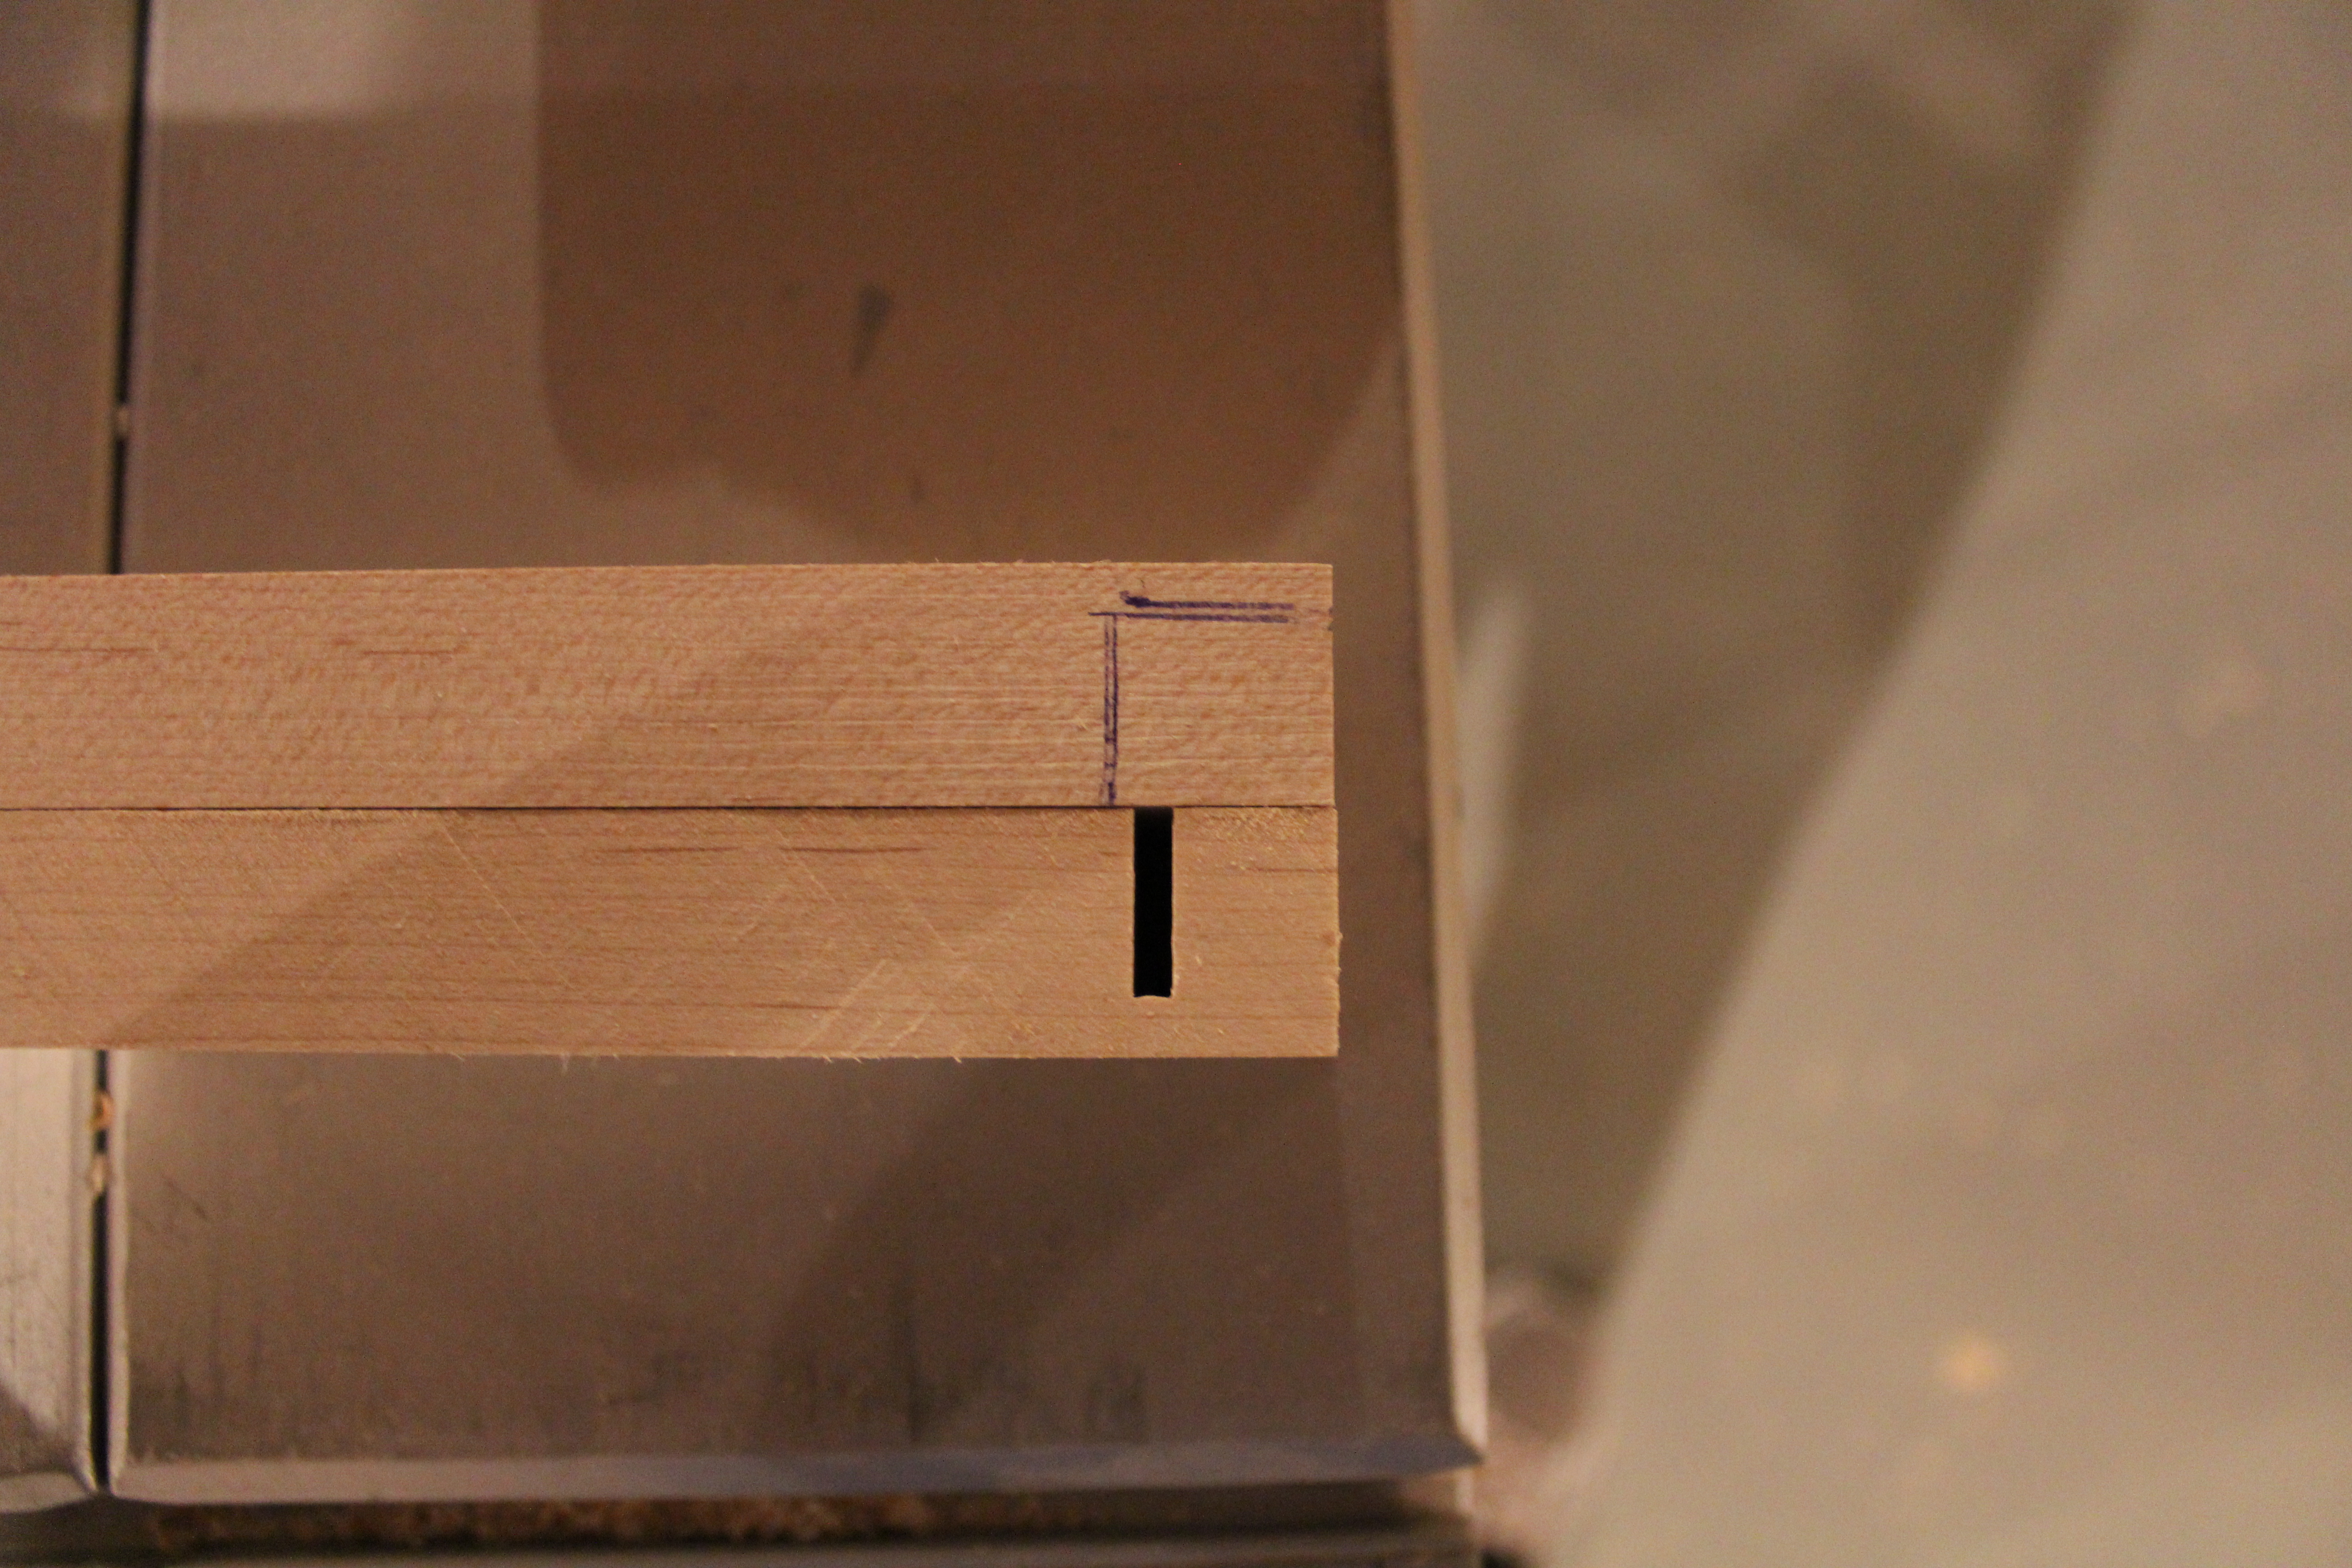
You can see that the pen line doesn’t exactly match the cut line, so I need to adjust my fence and try again!
Much better! Remember, I want to be on the right side of the pen mark and not thru it.
To take off the rest of the material, I’ll just run the board through multiple times and each time pull it further away from the fence. Each pass nibbles away a little bit of wood.
If you were thinking about maybe cutting it like this to remove the rest of the material instead…
That’s a clever idea, but unfortunately, it’s not safe nor is it stable. The piece is too narrow and would wobble too much. There are special jigs for the table saw that you can buy or make that will allow you to cut it like that, but it’s just easier to do the nibble method!
Once you’re happy with the results of the scrap piece, you can run all the front boards thru this step without having to adjust the table saw. The process is exactly the same for the side boards!
Next time we’ll use some dado blades to cut a groove in all the hardwood for the drawer bottom and we’ll start assembling them. Looking forward to getting this done.


