I want to try something a little different here so bare with me. I’ve said before that I’m not a fan of hiring a contractor to do something that I can do on my own. It’s just not in my nature. I’ll make exceptions to that rule, like when I’m too afraid of heights to paint our 2 story vestibule or like when the scope of the work is above my time and capacity (like building a home myself). Other than that, if I can do it, I want to do it. That’s why they call us DIYers right? So when I DO hire someone, in addition to getting the work done, I’d like to learn something from the experience. That’s why I’m starting this post category, to share what I’ve learned from an experience after the fact, whether it be from a contractor or from a job that I’ve completed myself.
The first time I had the idea to learn something from a contractor I was in a bind. Way back in 2004, I had just bought my first home and some guys were hanging drywall (I didn’t really know how to do much DIY back then). My father was over and we were doing some other small project. All of a sudden, we had water pouring into our living room. We had no idea where is was coming from. It was raining at the time, but not heavy enough to account for the amount of water building up in the house. I immediately turned off the water supply and we discovered that one of the drywall hangers had punctured a copper pipe with a drywall screw. To make matters worse, it’s 6pm and the next day I was going to Japan for two weeks and I had a roommate that needed that water while I was gone for obvious reasons. No problem. My father and I would repair it. We went to the local hardware store and got some couplings, some flux, sandpaper. We got this. After four hours of trying, we failed. This little pipe kept leaking. At 10pm we made the decision to call an emergency plumber. At around 1am this guy stopped by and knocked this repair out in 5 minutes flat. For $250! Knowing this would not be a cheap fix (relative to the size of the work), I asked the plumber to show me exactly how to do this and he explained to me what I was doing wrong. I felt much better about the expense of the repair knowing that I basically got a plumbing lesson out of it.
When I hired the painter for my vestibule, I genuinely didn’t think I would get much of a lesson out of it. But I did learn a couple things.
1. Taping. This guy didn’t tape a thing. He free-handed everything. I did a comparison to his work in the vestibule to mine in the living room. Despite the fact that I tape my trim, his cutting-in was cleaner. Let me show you what I’m talking about.
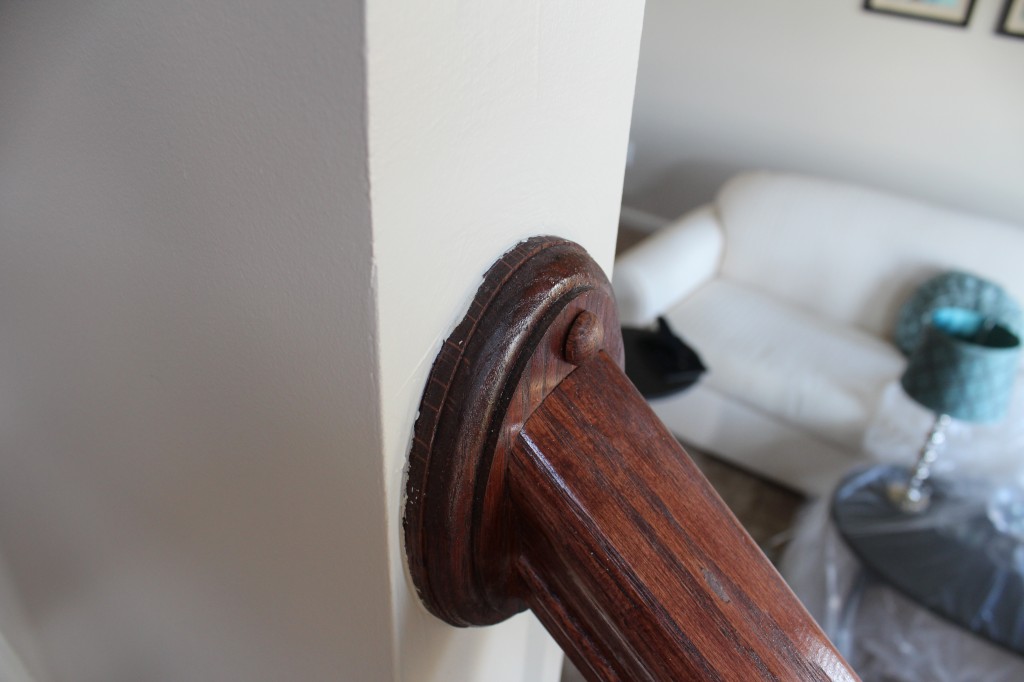
I taped and painted the molding around this banister. You can clearly see that I had bleed thru from the paint. That occurs where the tape doesn’t create a solid seal. I have this problem in several areas throughout the room. It’s not a big deal, but it does require some touching-up.
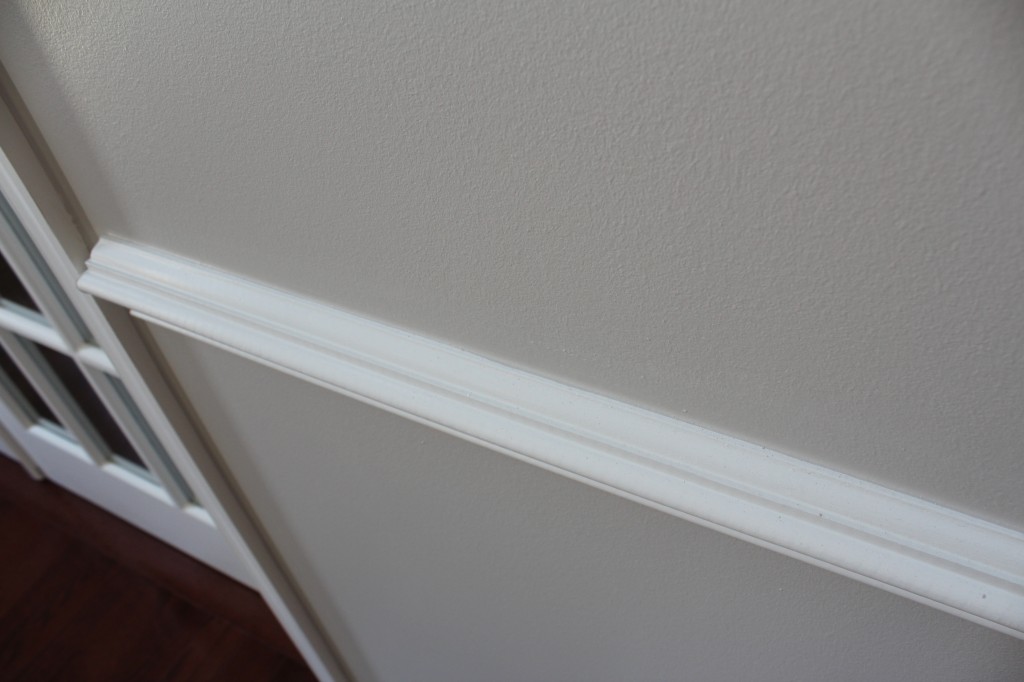
Now take a look at his trim painting. It’s perfect.
What was his secret? He used a quality brush and he has a LOT of practice. According to him, he uses a Wooster brush. For the rest of our painting, I picked up a Purdy brush, so we’ll see if I can improve on my earlier work. I’ll try working without a net tape.
2. The roller. He used a serious roller. They looked like mops. I’ve always used disposable rollers and haven’t had any issues. I like the idea that you can take them off and throw them out when you’re done with them. But my rolling occasionally makes areas with varying shine to them, almost like I missed a spot. And that’s with two coats. His work was even with a consistent appearance. He told me he uses Colossus rollers by Purdy.

So that’s my lesson’s learned from hiring a pro painter. I hope you get something out of this, I sure did.
Have you ever learned some tips from hiring a pro? Did it make it easier to justify paying for it?


