Lisa and I are still basking in the awesomeness that is our new hardwood floors. They’re so shiny and clean that I almost don’t want to walk on them… almost. Lots of sliding in socks going on around here. On Monday morning, I took a brake from basking and sliding and I started installing the shoe molding, aka the quarter rounds. Bruce makes a matching shoe molding, so we just picked up a couple boxes of those when we ordered our floors. Now, I’ve already done a post on molding installation, but I thought this post would make a nice little tutorial on how to make your molding installations faster. Having trouble figuring out which angle your wall is at? Read this tutorial.
Obviously, speed isn’t the name of the game when it comes to home projects. Quality and safety are number one. However, it doesn’t hurt to learn a few tricks now and then to reduce your work time AND get a more accurate result with fewer errors. Our family room is around 400 square feet or so and I managed to install all the shoe molding in under 30 minutes using this trick.
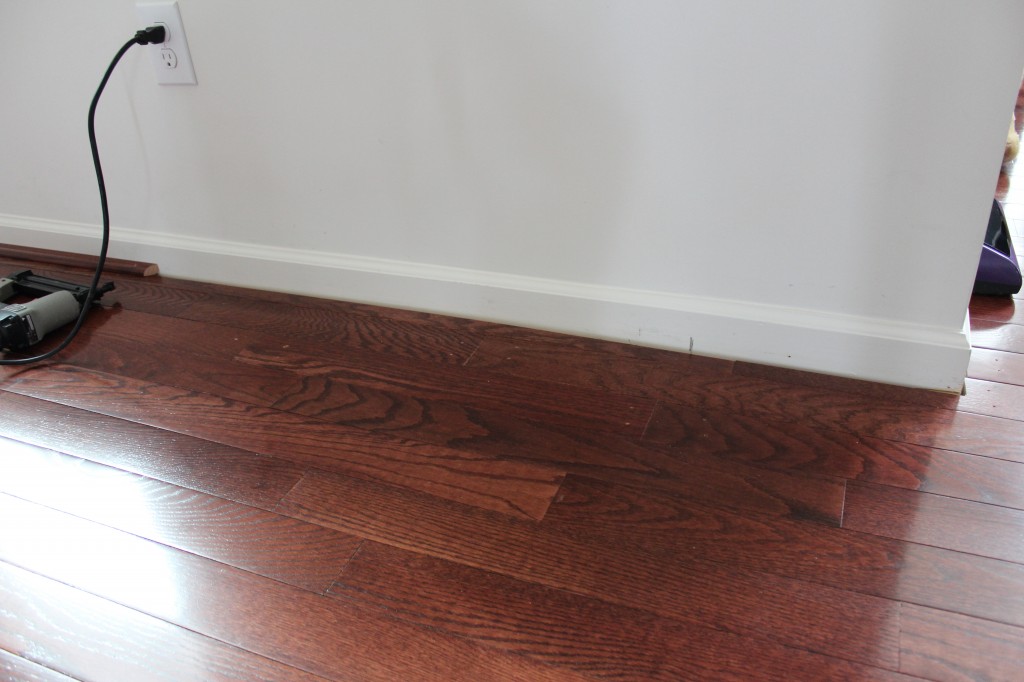
First thing’s first. You generally don’t need to use a tape measure to make accurate measurements. I just use the piece of molding I’m going to install and I mark that piece. In the photo above, you can see that I’ve already got a section of shoe molding installed to the left. I cut the end of that piece at a 45 degree angle (the pieces are only 6′ long so I need a few of them in a row to cover the wall). My next piece will start with a matching 45 degree angle. In this example, I need to determine how long this last piece will be in order for it to meet the end of the wall.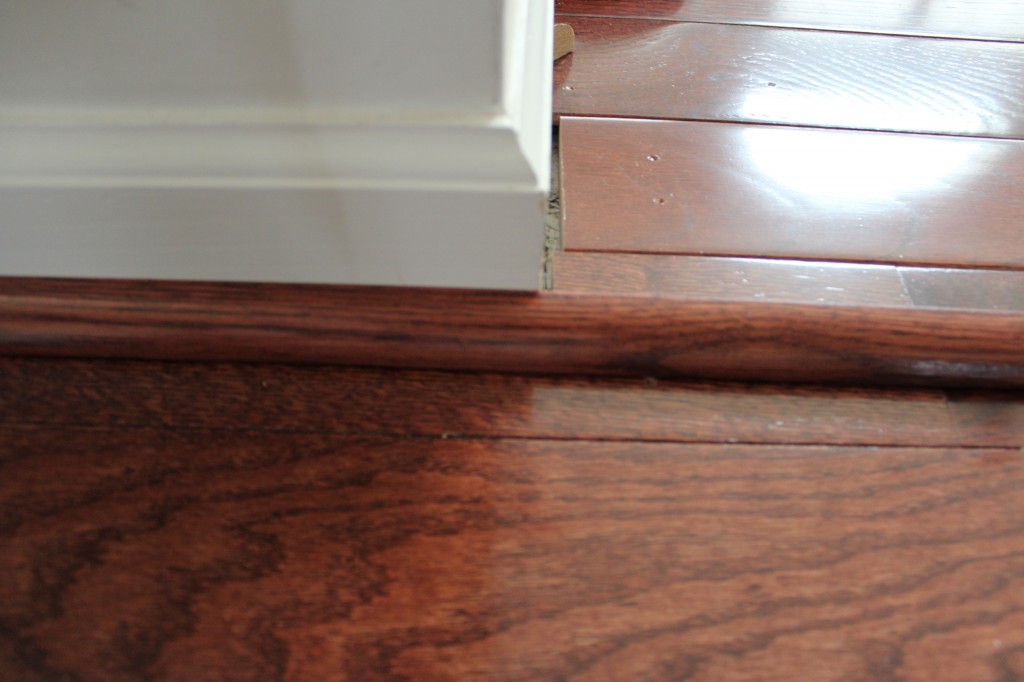
To get that measurement, there’s two ways.
1. Use a measuring tape and try to get the distance from the end of the last shoe molding to the corner of the wall. The only problem with that method is that it’s more prone to errors because you’re resting your tape measure on a piece of molding that’s been cut to an angle. So which part of the slice do you measure?
2. Use the molding itself. I cut the next piece of molding to match the one already installed and I lay it on the floor like I’m going to install it. That way the 45 degree cuts lap together nicely. Then I mark the piece where it meets the corner with a pen or a pencil.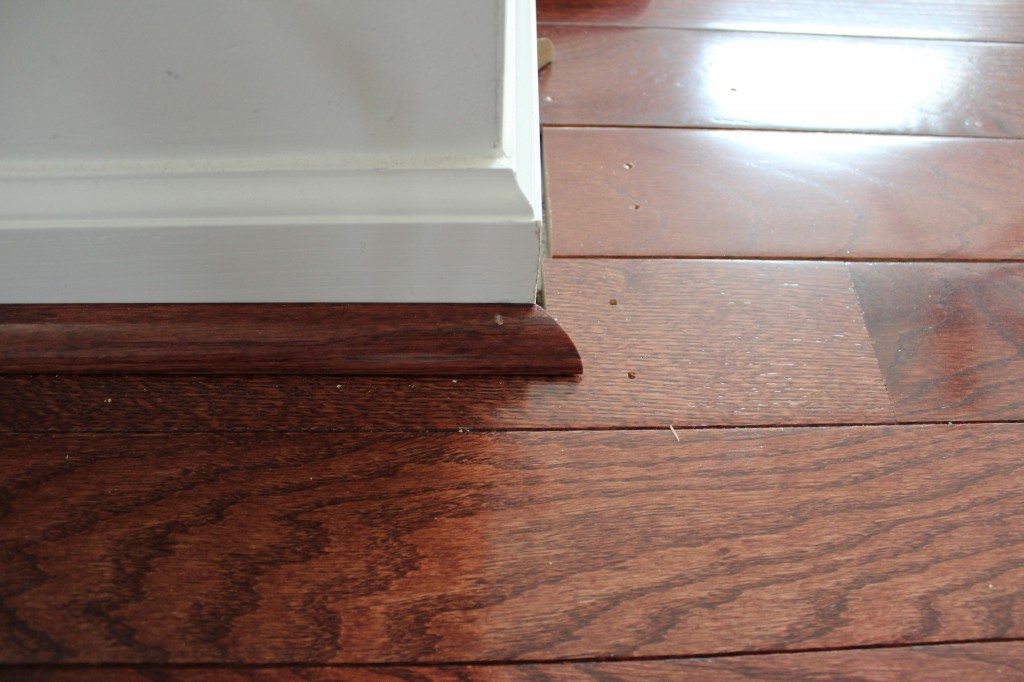
For outside corners like the one above, I can even mark the backside of the molding by running my pen along the baseboard molding, creating a perfect line on the back that marks the edge of the wall exactly.
For inside corners, I usually make my cut for the inside angle ahead of time on the molding and jam the molding into the inside corner of the wall first and try to mark the other side of the piece. This method essentially makes all your inside corners into outside corners. You’re just working in the other direction. Get it? If this verbiage is confusing, let me know and I’ll add some additional pictures to clarify. Maybe I’ll make another video to show how to do this throughout an entire room.
The speed of this method is best realized by allowing the molding to lay past whatever you’re measuring it against. For the examples above, this is done against an outside corner, but it could easily be against another piece of molding.
Hope that helps. If employed properly, you could really move through a molding job. I started using this a while back when I kept mis-measuring my cuts with a tape measure. I’d be off by about 1/8″ and it was driving me nuts!!
Have any additional tips for making molding fly besides throwing it?


