Thanks for stopping back. To continue our landscape lighting project, we’re going to install the 300 Watt transformer. If in the future we decide to add more lighting fixtures, we are limited to 300 Watts worth of total lights or we’ll either need to replace it or add a second transformer. We purchased our transformer from www.landscapelightingworld.com. These units generally cost a few hundred dollars depending upon the power capacity and can represent the single highest cost af any one item associated with a landscape lighting project. Light fixtures on the other hand range in price from about $10 to a couple hundred. Our flood lights were about $30 a piece.
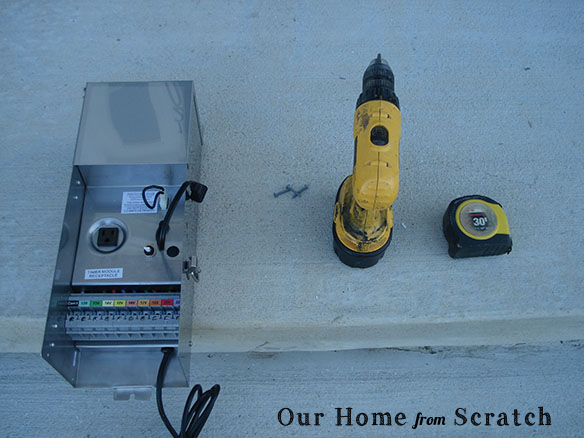
The transformer and the necessary tools for installation.
To install the transformer, first have a location selected that will allow the fixture cables to reach it with a reasonable amount of length, say 30-60 feet or so. The longer the cables run is between the fixtures and the transformer, the higher the output voltage will need to be to make up for resistance losses. For our install, we selected the right side of the house immediately adjacent to our existing electric meter to mount our unit. You could also put the transfomer inside the house, in a basement or garage it that’s easier for you. Since I don’t mind the way it looks on the outside and it’s completely weather proof, we installed it right onto the side of the house. Additionally, most transformers for low voltage lighting require an exterior outlet close by. Since we don’t have one close enough, we’ll have to add one at a later time. To test it out though, you can just run an extension cord. An extension cord is obviously not a permanent option however.
1. To start, you’ll probably need someone to help hold the unit up while you screw it into the house. Our transformer weighs around 25-30 lbs, so I held it in place while John screwed it right into the exterior siding and into the plywood behind it. It’s always recommended that you first read the manufacturer’s instructions for how exactly to install the transformer. Our transformer manufacturer recommended the unit to be at least 1.5′ off the ground. This will prevent snow from butting right up against it in the winter and potentially allowing water into the box. Any moisture in the box is a very bad thing. The transformer can short out and break or cause a fire and burn whatever it’s connected to, i.e., your house.
2. When screwing the unit into the house be sure to use the appropriate fastener. Since our unit was going into plywood, we used standard outdoor deck screws about an inch long. However, these screws wouldn’t suffice if our house was made from brick, stone or stucco. You can purchase just about any type of exterior grade fastener for mounting a transformer from your local hardware store.
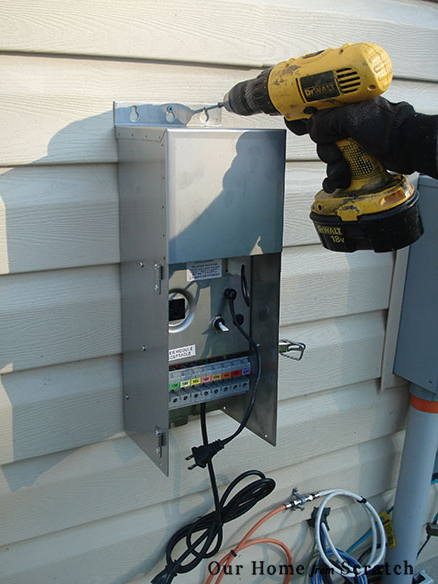
John screwing the transformer into the house.
3. Now that the transformer has been mounted, we can bring our cables into the box and make our connections. At the bottom of the transformer, a little plate gets attached to close off the transformer. That little plate has penetrations that can be popped open to allow the wires to be pulled in. Be sure to use a Romex connector or other appropriate wire clamps when bringing the wires into the transformer. These clamps will grab the cables tightly and prevent them from being pulled out by animals, kids, time, etc. For this post, we haven’t installed our Romex connectors yet, but we will before we finish the project completely.
4. Strip off the insulation from the ends of the wires entering the transformer. Since we have two circuits on our yard, we’ll have two different cables. Splice the two “white” wires together, but don’t splice the black wires together, leave those separate. Push the two spliced “white” wires into the space behind the Common or Com1 spot. Once in position, hold it there while tightening the hold-down screw. You can verify it’s held in place properly by giving the wires a firm tug downward. If they slip out, back out the screw and try it again. Now the two black wires can go together or seperately into any one of the other voltage pots. We chose to use the 13 volt slot for the lights that are further away and the 12 volt slot for the lights that were closest. You have the option to pick which voltage in order to make sure the lights are bright enough to your liking and you can always move them around later to get a better result. The goal should be to make sure no individual light nor any group of lights is noticeably brighter than the others. You want a balanced lighting scheme.
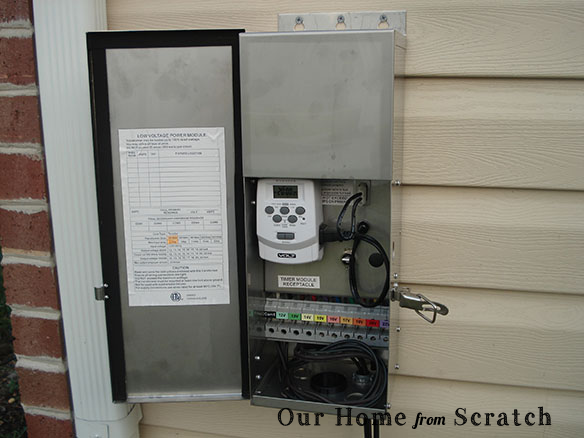
The interior of the transformer with both circuits landed. Notice the bottom plate has been installed.
Next time we’ll turn on the lights, add spotlights and finish the lighting project.
Check out Part 3!


