***Plans for this Table Saw Station are now available on our Plans Page. To get access, simply sign-up for our free newsletter***
This past week the family and I spent a few days vacation in Cape May, NJ. Been going there since I was a kid. Great family town. Lots of beautiful Victorian style homes. Made a visit to the Cape May Brewing Company while we were down there and tried some of their delicious beer. Got me thinking about trying to brew my own beer someday soon. I think I may need a whole other blog for that though! Anyway, didn’t get too sunburned so that’s a relief. I just turned 35 a few weeks ago and I’m at the age (and hair density) where I apparently need to apply a generous amount of sunscreen to the top of my head. Womp womp.
Anyway, was able to get back into the workshop and finish up my table saw upgrade. Let’s pickup where we left off after our first and second posts.
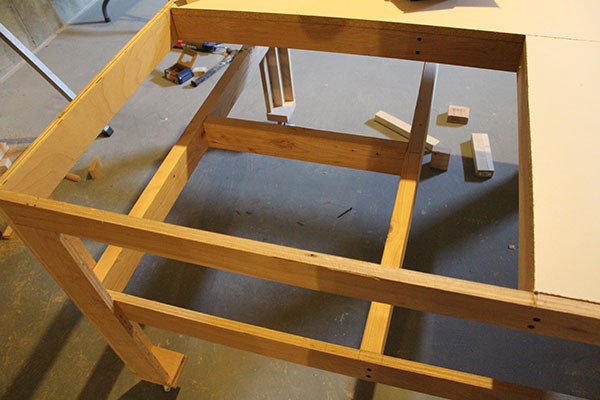
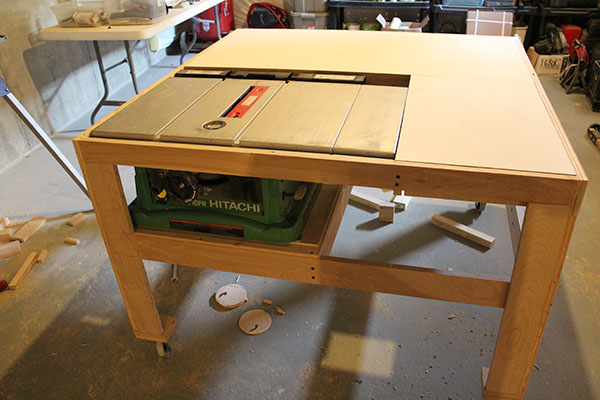
The frame was all built using some scrap plywood ripped down to 3.5″ in width. Once I was out of plywood, I finished the rest of the minor framing using 2x4s. They were in non-critical areas so I’m not too concerned about their imperfections causing and issues with the saw.
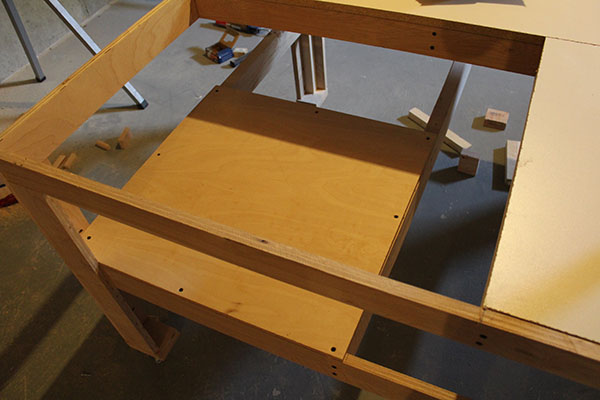
I then screwed down a piece of 1/2″ thick plywood right where the saw will be located. Turns out I probably could have used a 3/4″ thick board because I needed to shim the saw up some to get it flush with the table top.
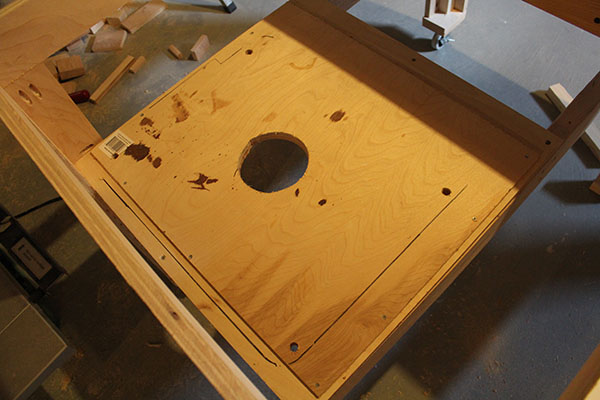
The saw has to be secured in place so it doesn’t move relative to the table or fence so I just went out and bought some longer hex bolts to keep the saw where it’s supposed to be. I also cut out a hole for the dust to be removed. At some point I’ll hook up a dust collection system and this hole will come in handy.
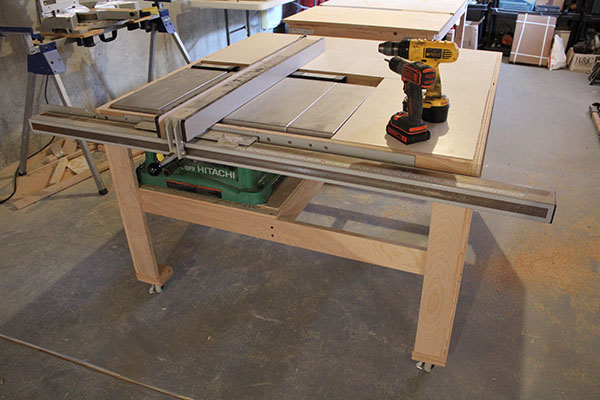
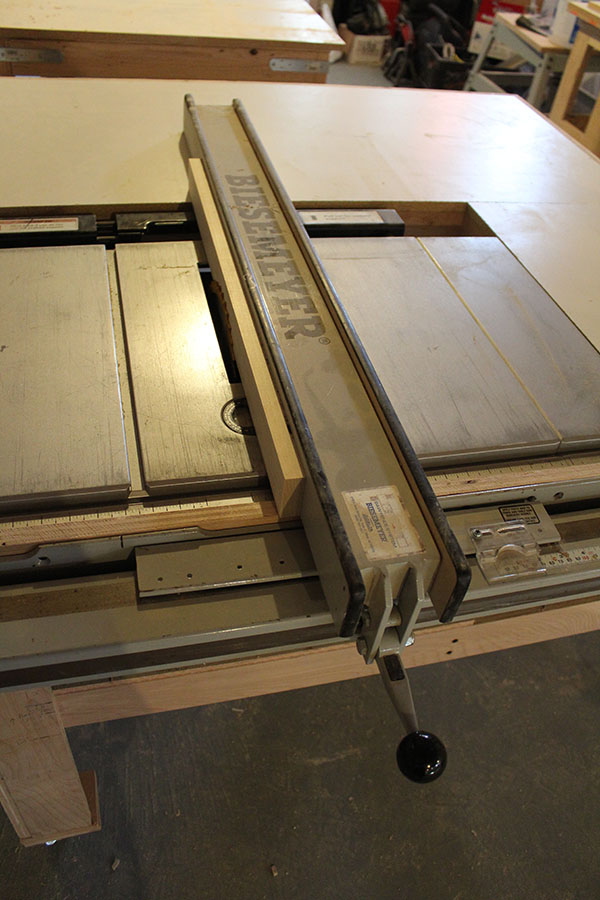
The tricky part was installing the Biesemeyer fence system. This fence was a leftover from my previous table saw and has been collecting dust in my basement for several years now. It simply bolts onto the front frame of the table.
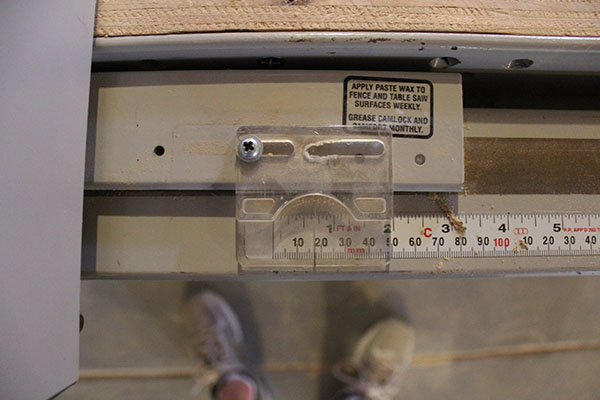
The fence system has a built-in tape measure that I calibrate by squeezing a 3/4″ thick board between the fence and the blade and then setting the indicator to 3/4″. Later on I’ll adjust the fence to ensure it is square to the blade. I’ll also show this table saw station in more detail in an upcoming video.
The best part of this table saw setup is it’s the same exact height as my other work table and the router table. That means they can all be in-feed or out-feed tables for each other. That alone is going to make cutting large sheets of plywood MUCH MUCH easier.
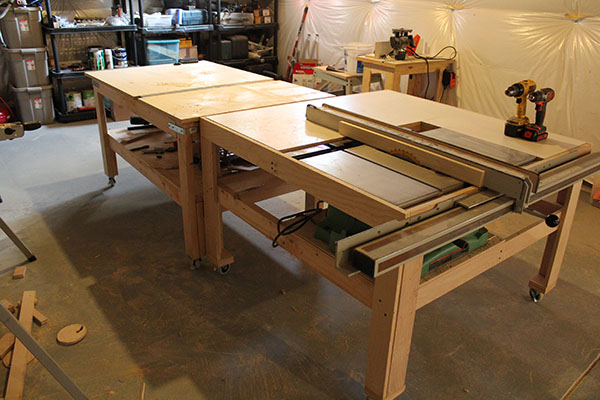
So in a few hours worth of work I’ve managed to build myself a simple work bench that compliments the other tables in the shop, adds over seven inches of width to the amount I can cut and cost me around $50 worth of fasteners, wheels and wood. Not too bad. This project is perfect if you’re looking to improve your table saw situation.
If you don’t have a Biesemeyer fence, which I wouldn’t expect you to, you can check out these picks from Amazon (affiliates): the Vega PRO, the Delta 36-T30 and the Shop Fox.
In our next post, I’ll be featuring a video on the basics of routers and router tables.


