Our home office remodel is going really well. We just finished the joint compound work, the ceiling has been primed and painted and just this evening I finished installing the ceiling lights. I just realized I owe you a complete list of every task we’ve completed and have planned for this space, that way you have a better idea of where we are. I think I’ll save that status list for next time.
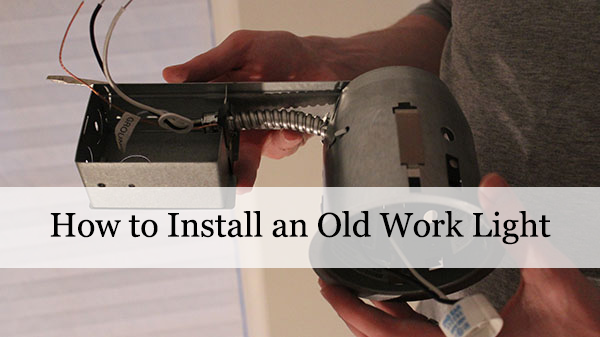
In today’s post, I’m showing you how to install old work lights.
If you’re not familiar with the term “old-work,” let me take a minute to explain it. Old work is a term that describes the type of electrical work being performed or the type of electrical equipment being used. In addition to “old-work,” there’s also “new-work.” What’s the difference? Good question. New work refers to electrical work that is being performed on a completely unfinished space, like new construction for example. New work electrical boxes are designed to be nailed right to an exposed stud BEFORE the drywall gets installed. New work boxes are super easy to install in new work applications. There are also new work light fixtures that get installed between overhead joists.
Old work on the other hand is for electrical work that is being done in a finished space. The equipment is designed to be slipped into finished walls and ceilings. Since you can’t nail an electrical box to a stud if the wall is covered with drywall, an old work box is designed to simply bite onto the drywall. If you wanted to, you could always knock down the drywall to get access to the studs and then use new work boxes. Depends on the situation.
In our office, we’re using old work for our overhead lights and receptacles (we had to move two outlets). The overhead lights are being installed in a portion of the ceiling that’s already been finished.
The process to install the old work lights starts with the wiring and cutting the holes in the drywall for the lights. I prefer to use 4″ halogen lights for nearly all overhead lighting applications. Big fan of the smaller look and I love that the lights gimbal so they can be directed around the room.
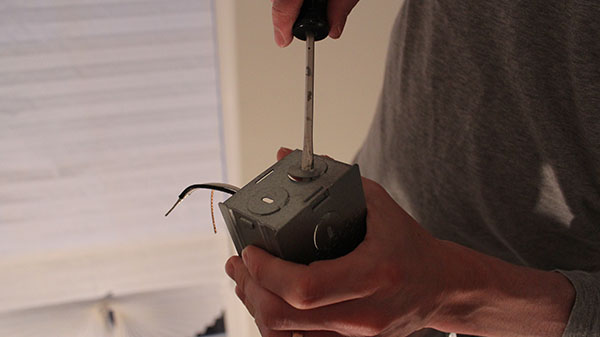
I’ll prepare my light fixture by removing one of the connector tabs from the attached electrical box with a screw driver or pair of pliers.

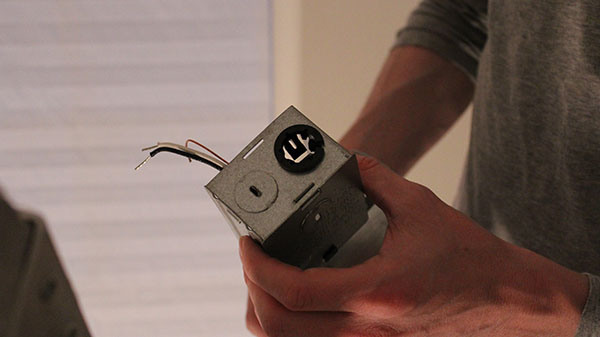
Next, I’ll pop in a plastic romex connector to protect the wire from rubbing against the metal box. You can also use the metal romex connectors. A connector is absolutely required, otherwise the romex wire could rub against a sharp edge or burr on the box and cause a short.

With the connector snapped into place, I’ll pull my wire through it until there is a few inches into the box. Obviously, I have the power off at the breaker. At this point, I stripped back my outer romex shield and wired the light to the house cable. I’m not going to show that step, but if you’re interested in learning how to make electrical connections, I suggest you learn from someone in-person. There are a ton of useful articles online as well as some great YouTube videos on wiring, but nothing beats some live, one-on-one training.
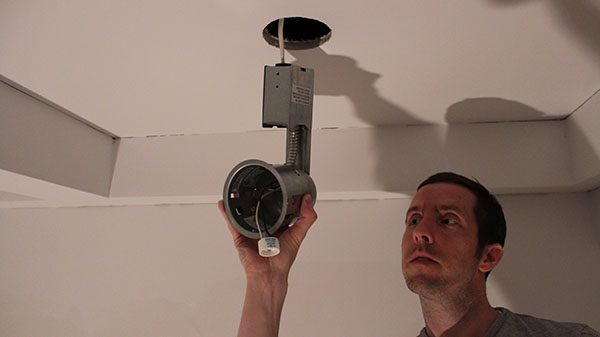
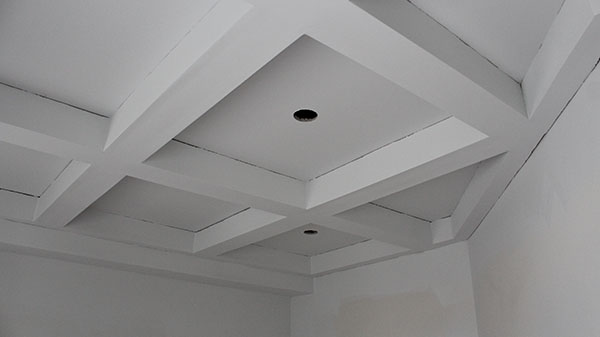
When the wiring is complete, I snap on the box cover and push the light into the hole in the ceiling. Tabs extend out from the light housing and grab onto the drywall preventing it from falling back out of the hole. The tabs actually keep the light fairly snug against the ceiling.
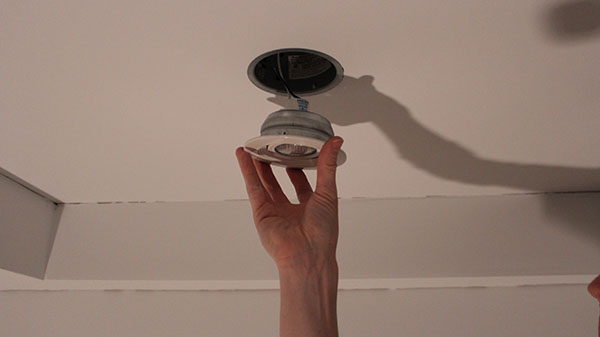
Last step is to just snap in the halogen bulb and finishing cover.
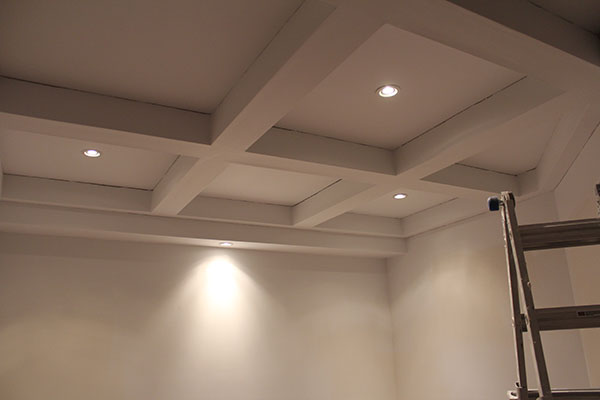
The room looks completely different with all four overhead lights illuminated. Gives the space a whole new feel.
In our next post, I’m going to share with you a new tool I bought to save a TON of time with the ceiling paint. I love it so much, I’m going to use it on the walls.
Have you ever worked with an old-work electrical device or do you prefer the new-work stuff?


