In this post you’ll learn about:
– Two different types of coffered ceiling options and the pros and cons of each
– How to design the layout of the coffered ceiling boxes using Excel and SketchUp
In between shoveling out from snow storms and salting our sidewalk, we’ve been winding down the concept development portion of our home office renovation. So far we’ve installed hardwood flooring and picked our furniture layout. The only thing left before we move into the detailed design work is the coffered ceiling.
Let’s start with the coffered ceiling concept design options.
Option 1: Wood
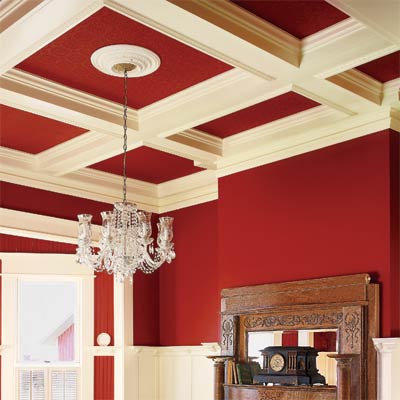 (via This Old House)
This is the most common approach I’ve encountered. It’s done with three pieces of wood and some crown molding. The advantage is it’s not very labor intensive and there are a ton of tutorials out there to illustrate the build process. The big disadvantage I see to this look is the cost. You’re looking at several hundred dollars worth of pine or poplar on the ceiling.
Option 2: Drywall
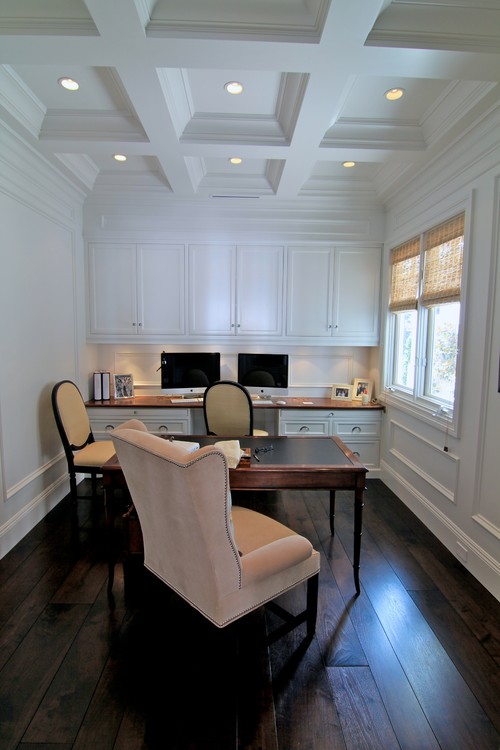
This is the approach we’re opting for in our home office. It’s a little less common and we love the high end look. The pros: It should end up being less expensive than using an all-wood design since drywall is fairly cheap. We’ll still need 2x lumber underneath the drywall, but we would probably need that in both options. The cons for this approach is the joint compound. It’s going to take some time and effort to spackle or mud and sand all those seams. Plus it’s overhead work, which means it’s going to be uncomfortable.
The Layout
Let’s take a quick look at how to layout something like this in a room. We’ll use our office as an example. To make this process easier I drew an outline of the room’s ceiling in SketchUp, just like in our furniture layout post. Instead of 3D, I just drew a 2D perimeter drawing of the room.
With the room outline drawn, the next thing I did was try to deconstruct what was going on in that last picture. It appears as though the coffered ceiling boxes are wide pieces of drywall and around the room there is a half-wide piece. Again, just guessing at that by looking at the Houzz.com photo.
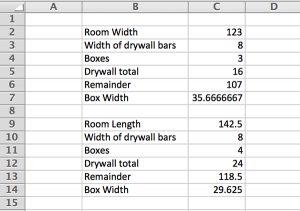
Next, I assumed that the wide drywall is 8″ and the more narrow drywall around the room is 4″. Now I’m going to use MS Excel to calculate how big the boxes should be and how many I should make. You can just do this part with a pencil, paper and calculator, but I prefer Excel since I can make changes on the fly with little effort. (If you want to see a video on using Excel for this type of work, check out our video here).
In Sketchup, I drew a 4″ wide box out from all the walls to mimic the photo. Then I measured how wide and long the room was with the 4″ box added. I entered the room width in inches into the first Excel cell. Then I entered what I think the drywall width is, which I’m assuming is 8″. The picture of the office has three ceiling boxes, so let’s start with that too. Next I calculate how much ceiling the width of the drywall takes up, which is 2*8″ = 16″ since you can see in the photo that there are two full 8″ wide pieces in the middle of the room. I subtract 16″ from the room width, 123″ – 16″ = 107″. I then divide the 107″ by how many boxes I have, which again, in this case is 3. That leaves me with about 35 5/8″ or so of ceiling space for each box. I repeat this process for the length of the room with the goal to try and keep the boxes close to looking like squares and not rectangles. I do that by adjusting the number of boxes so the box widths are within a few inches of each other.
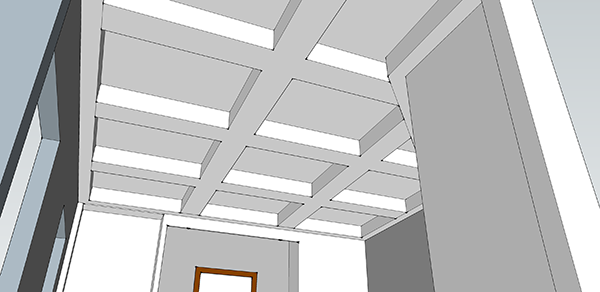
Ok. So now I know my dimensions of the boxes and the drywall. I can go back to SketchUp and draw out those boxes. I’ve extruded them to give them a 3D look and here’s what I end up with.
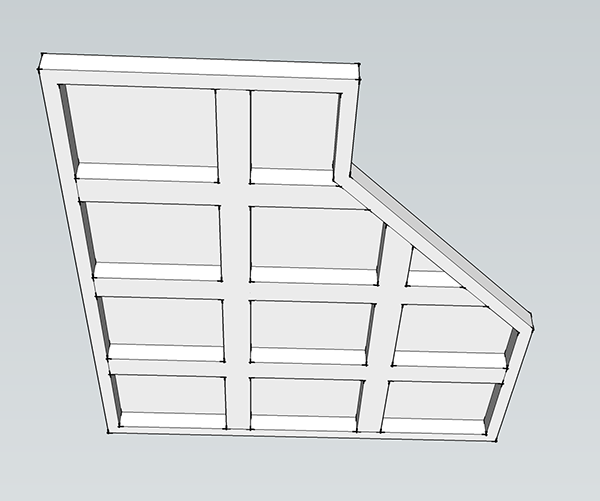
I then imported this ceiling model into my office layout drawing.
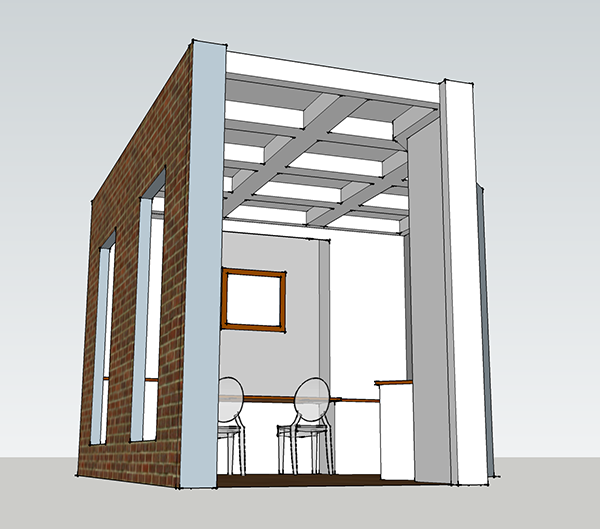
Here’s a closer view of how the ceiling meets the built-ins. I still have to make some adjustments to the built-in design to make sure it all plays nice together.
Each one of those boxes will have a full size crown molding installed in it. The perimeter of the room will also have some crown molding wrapped around it. Either most or all of those boxes will also have small can lights, for which I’ll need to pull a permit. I still need to figure out HOW to install all these boxes too. All I did here was dimension them to get the look we want.
So that’s pretty much the end of the concept design portion of our home office. Next I need to shift gears and dimension the cabinets.


