In this post you’ll learn:
– How room layout options can be tweaked to get desirable results
– How SketchUp can be used to design and build room layouts
With all the snow we’ve had this week, I had enough down time to work on our home office layout options. To make things easier on us, I used SketchUp to draw the room and try out different furniture arrangements. If you’ve never used SketchUp before I would encourage you to give it a shot. It’s an incredibly powerful tool for professional designers and your everyday DIYer can really take advantage of it’s easy to use interface. At the end of this post, I’m sharing a quick video I made that will show you how to use SketchUp for your own simple room layouts.
So, let’s dive right into our room layouts. We made four different versions with slightly different changes made to each. It was a bit of a goldilocks process. We started with something we liked, but didn’t love and then just made some tweaks until we got to where we wanted to be.
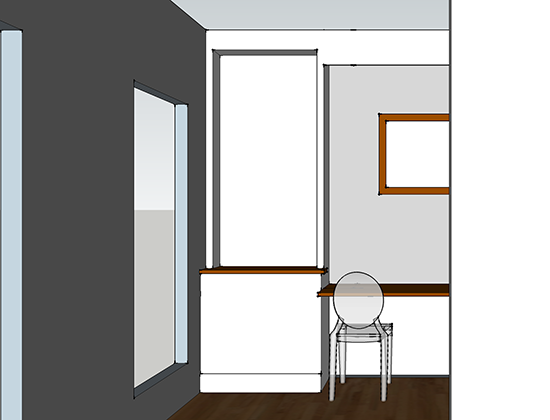
Option 1: Second Desk
The first layout option is the separate desk design.
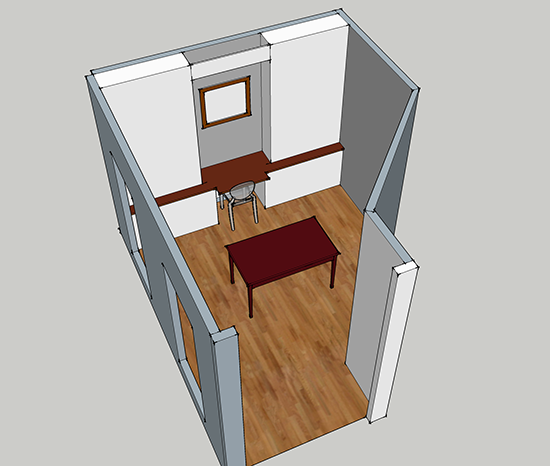
I like the back to back desk option. It was similar to a couple pins we liked. The built-ins on the back wall look a bit large and I think the angled wall in this room sort of takes away from the benefit of this option. Very cool idea, but maybe not ideal for this space.
Option 2: Side by Side Desks
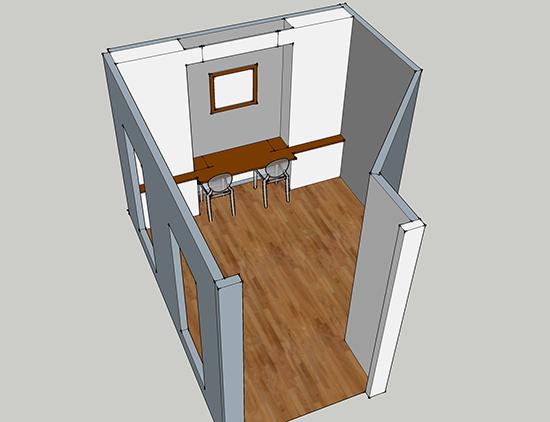
This layout is hit with both Lisa and I. The built-ins look like a good size for the room and the side by side desks open up the rest of the office for other options.
So what to do with the rest of the room? We’d still like some more storage.. Here’s what we came up with to gain more cabinet space.
Option 3: Second Large Built-in
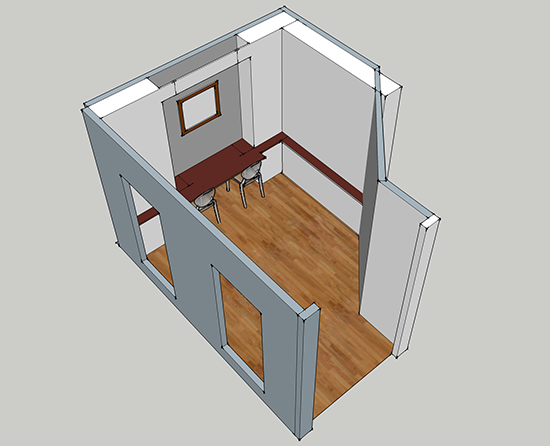
We took a look at adding a second built-in along an adjacent wall and didn’t like the result. Sure, we gain a ton more cabinet storage, but the back wall cabinets now look unsymmetrical. That’s a deal breaker.
Option 4: Smaller Separate Cabinet
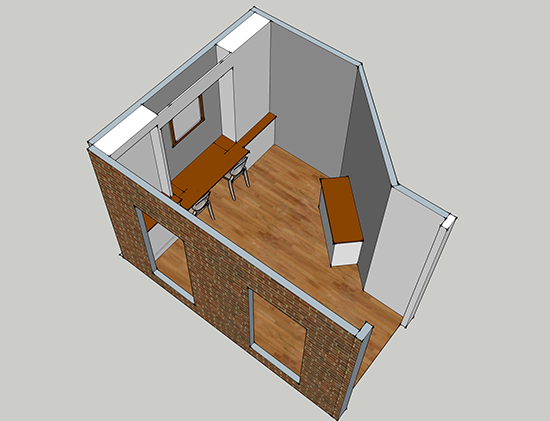
This is the layout option we’re favoring at the moment. We get to keep the symmetrical built-ins along the back wall, get some additional storage and still have extra space leftover for a kids corner.
We also decided to make the built-in countertop site higher than the desktop. You can see the height difference in this next photo.
So that’s our layout options as seen in SketchUp. You don’t need to be an architect or a graphic designer to make your own room layouts. Here’s a video we whipped up to show you some of the basics of using SketchUp for room designing.
Next time we’ll discuss coffered ceiling design options.


