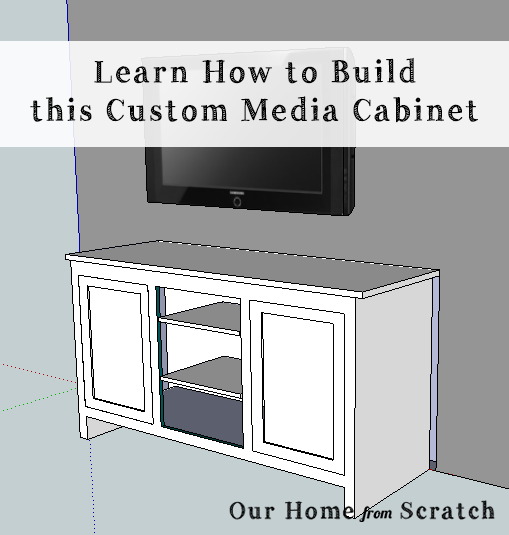
Very happy to be diving into another carpentry project. If you’re new to our blog, last spring we made a built-in from scratch and installed it in our sitting room. This time around we’re building a custom media cabinet to match. Over the course of the next few weeks, we’re going to show our readers how to design and build this cabinet from the first step to the last. I’m going to try and make this as instructive as possible. If you want to build one yourself one day, this should help.
Here’s a sneak peak of what it will probably look like…
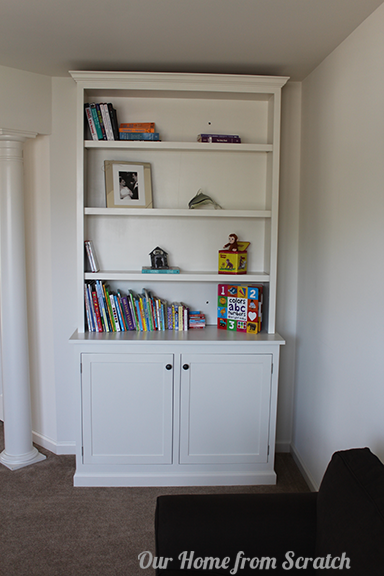
In this post, we’re starting with the overall design of the piece. As I mentioned, it should look a lot like our built-in already in the room. Here’s what that looks like:
Here’s where the new cabinet is going: right beneath our wall mounted TV.

Before I do anything, I like to start by constraining the overall dimensions of the piece. So, I’ll try to nail down the height, width and length of the cabinet. That’ll be a big help when I actually do some detailed design later on.
I’d like this new cabinet to stick out 18″ from the wall, which is the same depth of the other built-in. I’m also going to use the same height as the TV stand in our family room, which is 27.” So the only dimension we need now is the length.
To get a length we’re happy with, I’m going to draw the cabinet as a box in Google’s SketchUp, but you could just as easily draw it on paper, maybe mark the dimensions on the wall, or use some painters tape on the carpet. The goal here is to get a feel of just how long we need the cabinet to be.
There are a few other requirements. I’d like to be able to hide the electrical outlet if possible. I’d like to have some open shelving for our PS3 and I’d like at least one or maybe two cabinet doors for storage.
Arbitrarily, I chose 40″ as a possible option and then 50″ since it will hide the outlet. Here’s how a 40″ wide cabinet looks compared to a 50″ wide unit.
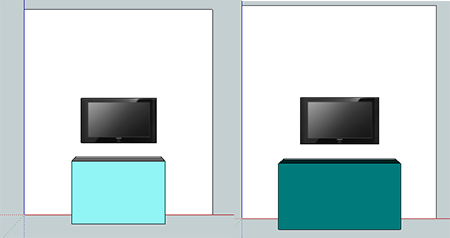
The unit on the left is the 40″ version and just by looking at it compared to a 32″ TV, I can see that we probably will be more limited in the number of doors and shelves we can fit in it. The 50″ on the right will probably allow me to squeeze some shelves and a couple of doors, not to mention it will hide the wall outlet, while the 40″ won’t cover it.
So, let’s go with 50″ in width. You starting to see how this works? The dimensions are just based on whatever we need them to be.
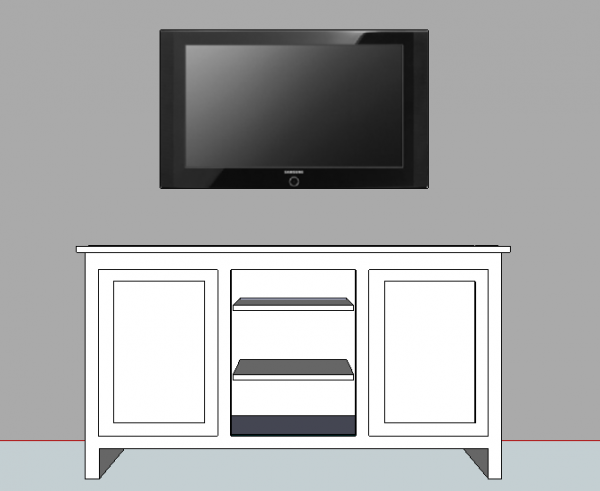
I took some time in SketchUp to draw out what the finished cabinet will probably look like. I didn’t include the baseboard molding, but that’ll be there too. In the drawing I set the width of the shelf area to be just wide enough for our PS3 and maybe a DVD player. 16″ should cover it.
The width of the doors are just what’s left over from the 50″ width and the roughly 16″ opening. We’ll get into the exact dimensions in our next post.
That’s pretty much all there is to the first part of the design process. We have our overall dimensions and I have a rough sketch of how I want the cabinet to look. We know how it will look underneath the TV and it meets our requirements of matching the built-in, covering the electrical outlet and having some shelves and doors.
In our next post, we’ll dimension all the individual pieces one by one. From there we’ll put together a shopping list and pick our materials.
If you have any questions on anything you read here, please don’t hesitate to ask. I’d like these posts to be interactive and a learning experience for those looking for it.


