Hey everybody! Hope you all had a great weekend. Lisa and I had a fairly busy couple days. We picked a paint for our daughter’s bedroom and I started cutting it in. We love the color. I’m not sold on how it looks with the carpet quite yet, but we’ll see how it looks once the room is all setup and staged.
In other news, our permit to add an additional outlet behind our sitting room’s flat screen TV has been approved and I’m ready for our rough-in inspection. In case you were wondering what the general process is for pulling an electrical permit..
1. Plan work and come up with a rough estimate for the cost of the material.
2. Apply for electrical permit at local township office.
3. Receive go-ahead from local township or a call back for more info.
4. Do the rough-in work without adding any devices (switches, receptacles, etc)
5. Have rough-in inspected.
6. Device out (add outlet, switches)
7. Have finish work inspected.
We’re at step 4. Here’s how it went…
Hide a flat screen TV power cable:
Last time we posted, we cut the hole for the outlet behind the TV.

To my delight, this interior wall happens to have studs that are 24″ on center (oc).
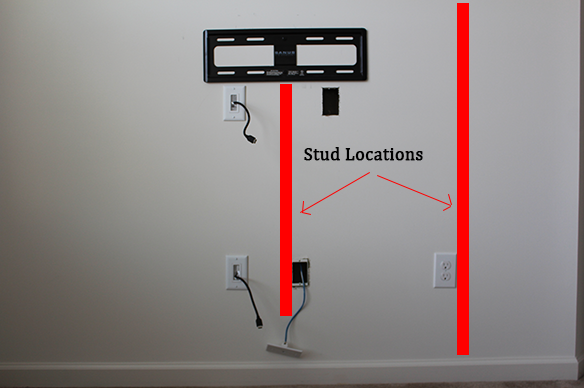
I was able to find the stud locations by tapping on the wall and using a stud finder. I also popped off the phone jack and peaked into the wall space with a flashlight and a small mirror. So, since there are no studs between the lower power outlet and the new outlet, I won’t have to remove any additional drywall. I can simply “snake” the new cables from the lower box to the upper hole.
***ALWAYS DO ELECTRICAL WORK WITH THE POWER OFF AT THE BREAKER OR FUSE PANEL***
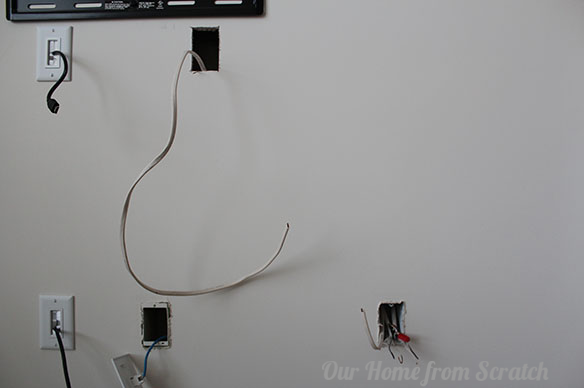
I remove the bottom outlet and snake the push the wire through the bottom box and up the wall. The wire I’m using is stiff enough to get pushed fairly easily.
The top hole will receive an electrical box specifically designed for renovation type work or walls that you don’t want to open up.
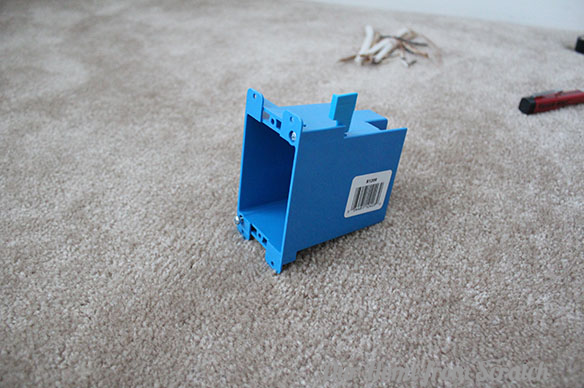
The box pushes into the wall and two screws are tightened, which flip tabs up that grab and squeeze the drywall. Before the box is inserted however, the wire is run through the box.
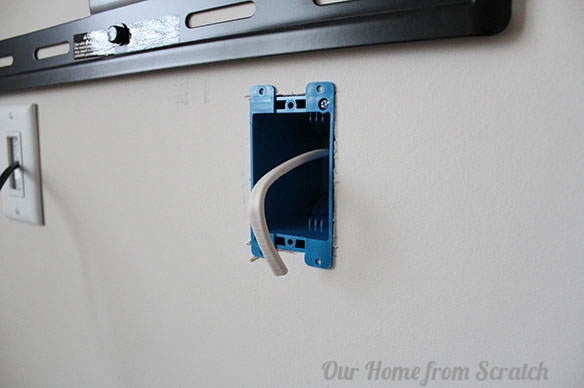
With the box firmly in the wall and the wire pulled through, the excess slack is cut off, leaving about 6″-7″ of wire hanging out of the box.
The new wire is then spliced into the bottom box’s wiring. I’m not going to show that part. You can find a how-to on that part on YouTube.
So now we’re all set for the rough-in inspection! Can’t wait to knock this out so I can get on with the sitting room furniture.


