Since Lisa and I started to assemble the nursery last December, we knew we would probably need a bedside table. We had a little extra space for another piece, so something small and round seemed like the best choice since it would probably be where we rest the lamp and the baby’s angel care monitor.
I still can remember Lisa really liking these Flower Accent Tables from Pottery Barn. But they weren’t going to work in our nursery since we ended up with the dark espresso furniture and they only come in white and pink.*

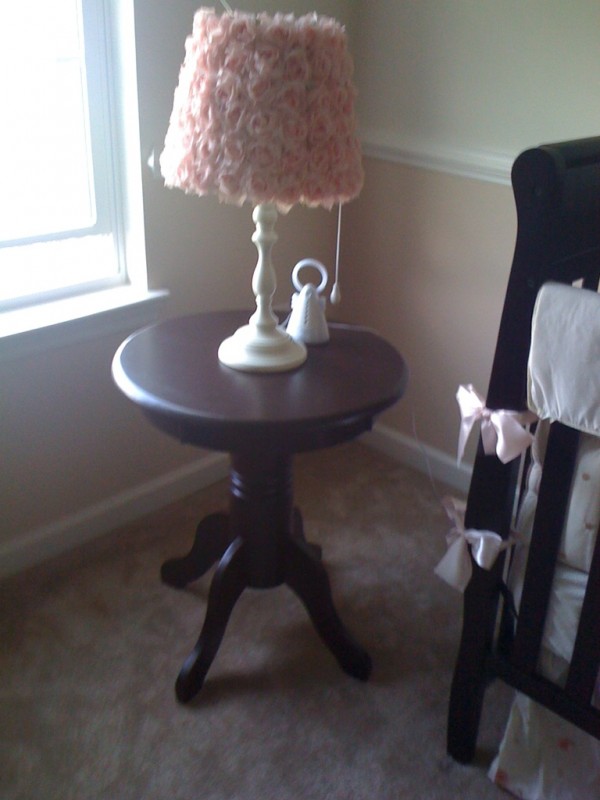
Oh, and don’t let this photo on our nursery page fool you…

That table normally doesn’t go there. It was put there to make it look like the room was completed, but really that table doesn’t have a permanent home at the moment.
After looking around online at our options we thought it would be a fun project to buy an unfinished furniture piece and stain it ourselves!! Not sure what we were thinking. Matching a deep, rich espresso stain has been a little more than we bargained for.
Our first stab at this (and it’s definitely more of a stab then anything) was to buy an unfinished softwood piece, pine perhaps. I think I worked on this back in January. After a few coats of ZAR Woodstain’s Moorish Teak, I wasn’t very happy with the results. The salesman had convinced Lisa that a couple coats of this stain and the table would be a nice dark espresso. Well, it wasn’t. As soon as you apply the stain and then wipe it off, it leaves a fairly light look behind. However, I did notice that if you didn’t wipe off the stain and instead just applied it like a thin layer of paint, I got that dark espresso finish I’d been looking for. I figured “Jackpot, I’ll just apply poly right over the stain and I’m in business.”
Wrong. As soon as my foam brush loaded with shellac hit the top of the table, it smeared my un-wiped stain all over the place. It looked like rubbish almost immediately See, the stain doesn’t dry unless you wipe it off with a dry rag. It basically stays gummy. Plus, since I just applied a varnish, I would have to sand it down to bare wood practically to get what I was after. No thanks! That was months ago…
So, we’ve since revisited the issue. We returned back to the stores and online shopping sites looking for our fabled crib side table. About two weeks ago, we realized our best shot was to give unfinished furniture another chance. For those of you who don’t know me, I’m overconfident in my DIY abilities and apparently a glutton for punishment.
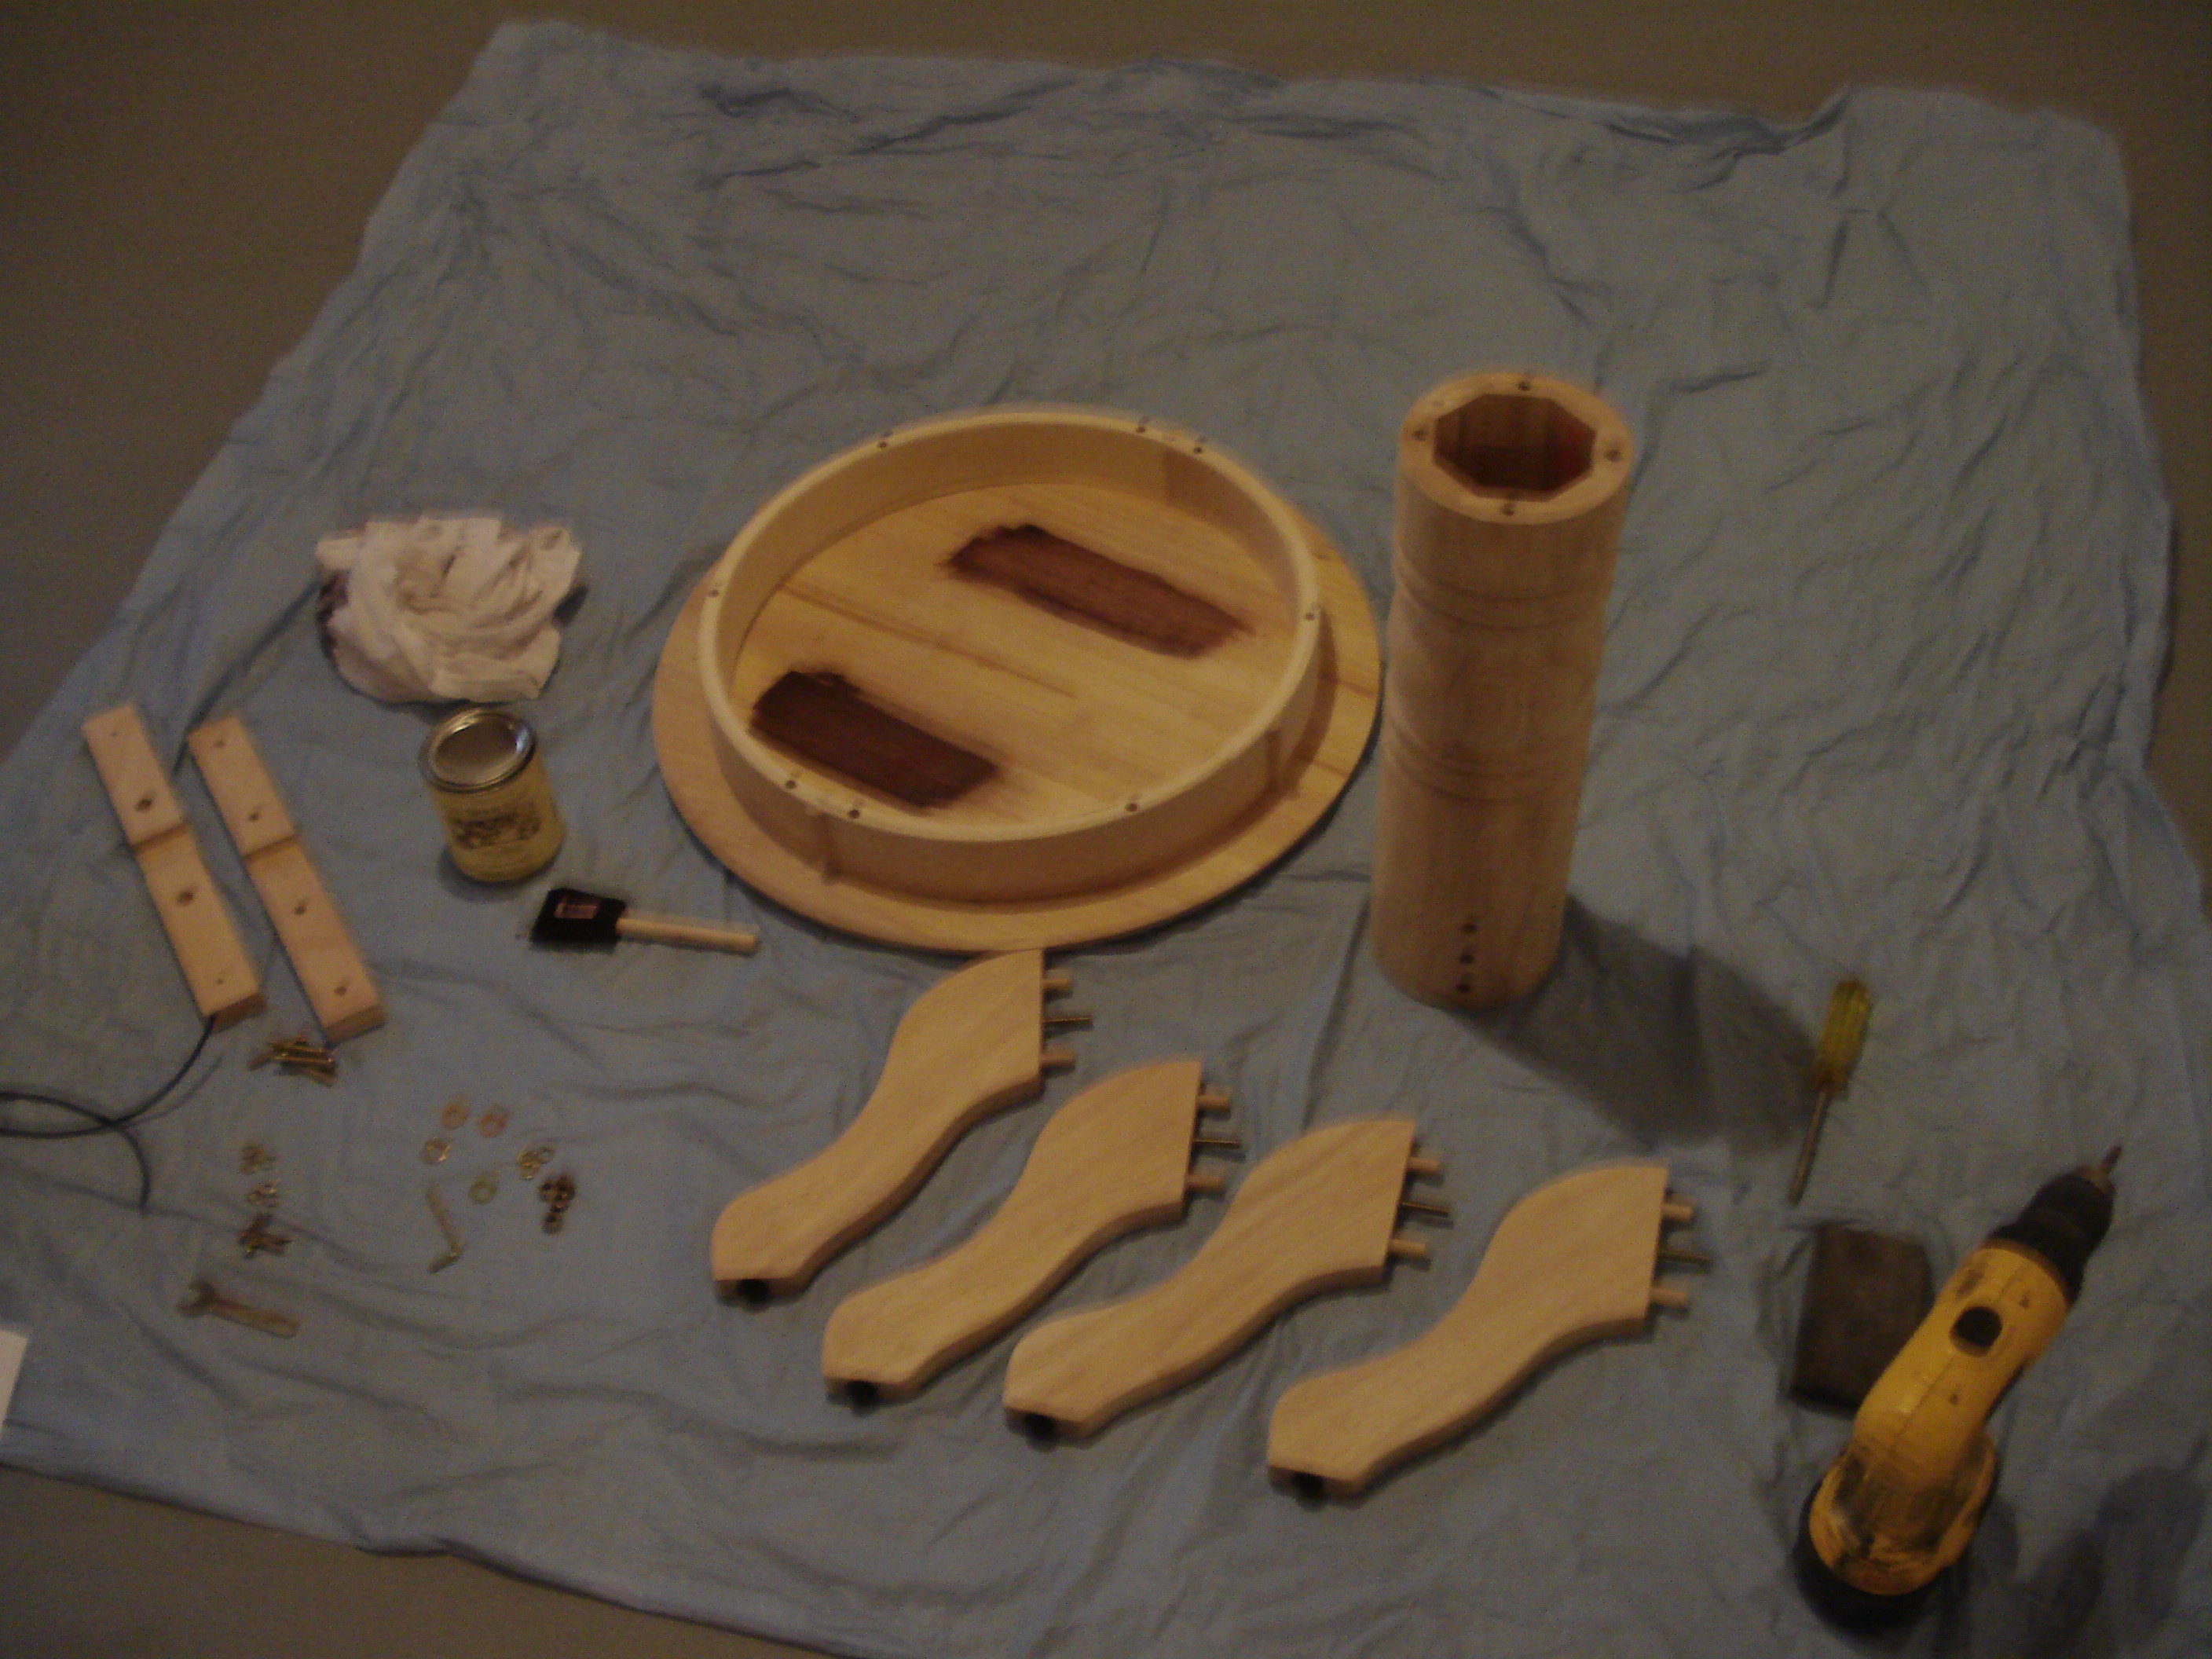
From the same vendor, Howard Hill, we bought a beautiful pedestal table. It’s not red oak since it’s from Vietnam, but it’s similar in grain, color and hardness. For this go ’round, I thought I’d just pick out a better stain and maybe attempt a couple more coats. You know. Stick to convention and listen to the nice man selling the stain.
Here it is unassembled…

After assembly… lovely right?

Now for the base coats. I applied two coats of Old Village stain in the Black Mahogany color and then wiped them off with a clean cloth. The Old Village is a gel type stain, so it goes on a little goopier.
After the first coat, it looked like this… Nice right? Not dark enough though.

Now for the second coat… Looking a little darker. Little richer. Not dark enough yet though.

For my third coat, I used the ZAR Moorish Teak (or maybe it was the moopish teak?) and it basically looked the same as it did after the second coat. At this point, I was starting to get more than a little bit frustrated.
When I was applying that third coat, I had that old familiar feeling again. That feeling that said “Don’t wipe it. It looks really good unwiped. Maybe we can try this whole non wiped thing again.” As before, I couldn’t resist the temptation. But this time I had experience on my side. This time I knew that if I tried to brush on a varnish, I would ruin the thick coat of stain. This time would be different. This time I came up with a brilliant idea… I don’t have to brush the varnish on, I can spray it. BOOM!
")
So. I moved my project from the basement up to the garage due to all the fumes from a can of spray poly and I began blasting away.

The beautiful thing about using stain essentially as a paint is that it still looks like a stain and it even shows the grain off nicely. It’s very unorthodox as far as I can tell, but it worked well for me. Another bonus of this technique, if you want to call it that, is you can reapply stain over the poly if you find bare spots.

After all is said and done, I’m not sure if I would have been better off with just finding an espresso paint. The point of stain is to enhance the natural beauty of the wood and I just gobbed on stain right over it. That point certainly isn’t lost on me. However, my goal was to get an inexpensive piece of furniture to match a factory finished crib and I think I did alright.
If anyone has any major or minor criticisms of this method, I’m happy to hear them. Anyone else do any unorthodox DIY projects?
*Addendum. I’ve recently checked the Pottery Barn Kids page for the above mentioned tables and it is now available in espresso… awesome.


